MT prompt set / auto post-editing condition set / AI prompt set / AI proofing rule set management functions MTrans Online User Guide
Click  in the sidebar to access the MT prompt set management function, the auto post-editing condition set management function, the AI prompt set management function, and the AI proofing rule set management function.
- MT prompt set management function
- Auto post-editing condition set management function
- About the auto post-editing condition set list view
- Create an auto post-editing condition set
- Search for an auto post-editing condition set
- Rename an auto post-editing condition set
- Control access to an auto post-editing condition set
- Delete an auto post-editing condition set
- Manage auto post-editing condition items
- Register an auto post-editing condition item
- Delete an auto post-editing condition item
- Enable or disable an auto post-editing condition item
- Swap auto post-editing condition items
- AI prompt set management function
- AI proofing rule set management function
- About the AI proofing rule set list view
- Create an AI proofing rule set
- Search for an AI proofing rule set
- Rename an AI proofing rule set
- Control access to an AI proofing rule set
- Delete an AI proofing rule set
- Import an AI proofing rule set
- Export an AI proofing rule set
- Manage AI proofing rule items
- Register an AI proofing rule item
- Set proof targets
- Delete an AI proofing rule item
- Swap AI proofing rule items
- Revision history
MT prompt set management function
The MT prompt set management function manages AI prompts as translation instructions (hereafter referred to as MT prompts). Click in the sidebar and then click "MT Prompt Set" to access the MT prompt set management function. The registered MT prompts are available as translation instructions toward the generative AI-based MT engine "OpenAI" in the following MTrans products.
- MTrans Web
- MTrans for Office (Mac/Web version)
About the management and ownership (access restriction) of MT prompt sets
MT prompt sets can be managed as one set per owner (access restriction). Owners (access restriction) are divided into three types: "For Me (Private)", "For All Users", and "For User Group". In "For User Group", each user group can manage an individual MT prompt set. Users can access the MT prompt sets owned by the user groups they belong to. For more information on user groups, see User group management function.
Register an MT prompt
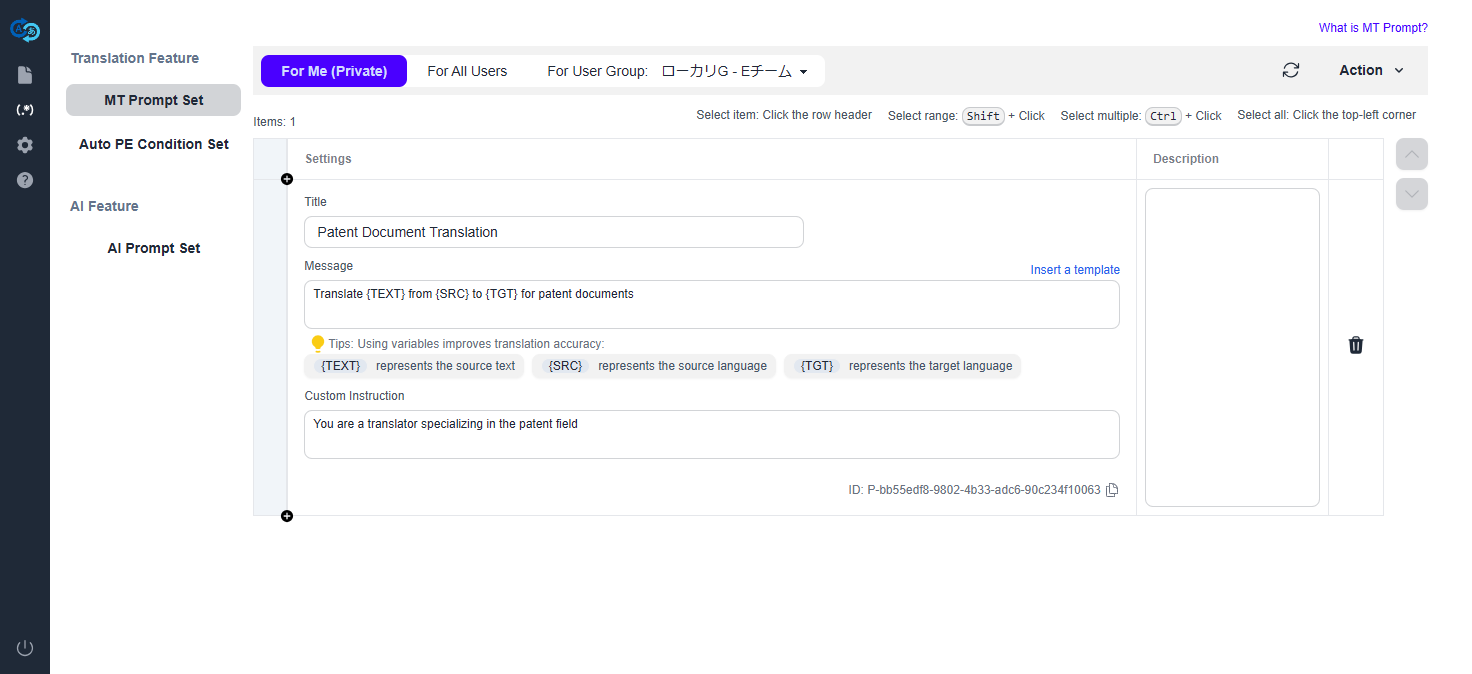
To register an MT prompt, click ![]() at the beginning of each row in the MT prompt list to insert a row. Enter a title of the MT prompt in the "Title" field. Enter a translation instruction for the generative AI in the "Message" field. Enter the role you want the generative AI to play in the "Custom Instruction" field.
at the beginning of each row in the MT prompt list to insert a row. Enter a title of the MT prompt in the "Title" field. Enter a translation instruction for the generative AI in the "Message" field. Enter the role you want the generative AI to play in the "Custom Instruction" field.
Example of an MT prompt
- Title: "Patent Document Translation"
- Message: "Translate
{TEXT}from{SRC}to{TGT}for patent documents" - Custom Instruction: "You are a translator specializing in the patent field"
About variables
When you use the following variables in the "Message" field, you can give more specific translation instructions to the generative AI.
{TEXT}: the source text{SRC}: the source language{TGT}: the target language
This will help the generative AI provide more appropriate translation results.
Delete an MT prompt
To delete an MT prompt, click ![]() at the end of the line in the MT prompt list. A confirmation message will appear. Press the "OK" button. To delete multiple MT prompts at once, you must select the MT prompts by
at the end of the line in the MT prompt list. A confirmation message will appear. Press the "OK" button. To delete multiple MT prompts at once, you must select the MT prompts by Shift + clicking, Ctrl + clicking (for Windows), or ⌘ + clicking (for Mac) the beginning of the rows in the MT prompt list. If you click the header of the beginning of the rows of the MT prompt list, you can select all the MT prompts. You can also deselect all the MT prompts by clicking it again. After selecting MT prompts, click the "Action" > "Delete" menu in the header menu. A confirmation screen will appear. Press the "OK" button.
Swap MT prompts
To change the application order by swapping the MT prompts, click a row head to select the MT prompt, and click the "![]() " button or "
" button or "![]() " button next to the list to move the prompt.
" button next to the list to move the prompt.
Auto post-editing condition set management function
The auto post-editing condition set management function manages replacement conditions and prompts of the auto post-editing function (a function to edit translation results of MT engines). Click in the sidebar and then click "Auto PE Condition Set" to access the auto post-editing condition set management function. The registered auto post-editing condition sets are available in the following MTrans products.
- MTrans Web
- MTrans for Office (Mac/Web version)
- MTrans for Phrase TMS
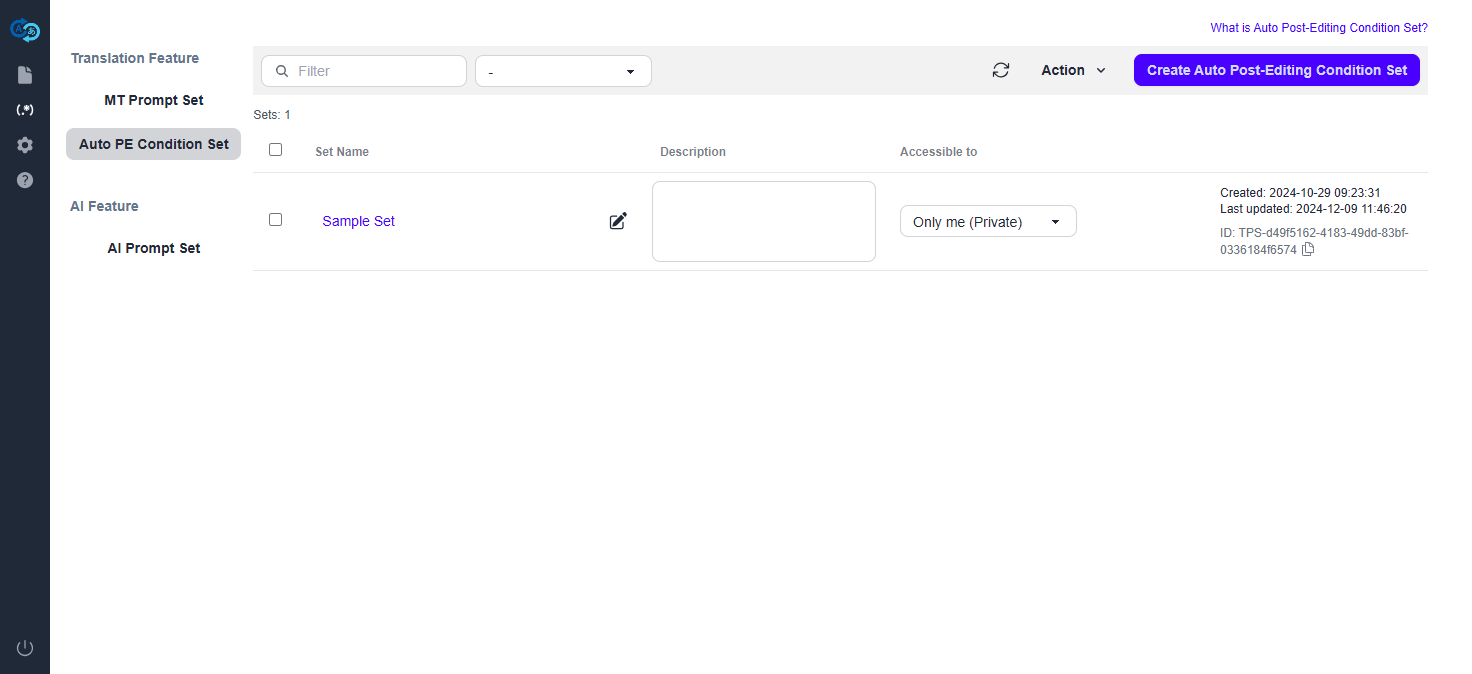
About the auto post-editing condition set list view
When you open the auto post-editing condition set management screen, the created auto post-editing condition sets are displayed in a list format. However, private auto post-editing condition sets or those accessible to a specific user group will not be displayed to users who are not authorized to access them. For more information on restricting access to auto post-editing condition sets, see Control access to an auto post-editing condition set.
Create an auto post-editing condition set
To create an auto post-editing condition set, click the "Create Auto Post-Editing Condition Set" button in the header menu. The input screen appears. Set the auto post-editing condition set name and the access setting, then press the "Create" button. For more information about the access setting, see Control access to an auto post-editing condition set.
Search for an auto post-editing condition set
To search for an auto post-editing condition set, type a keyword in the "Filter" box on the header menu. auto post-editing condition sets that partially match the auto post-editing condition set name or description will be displayed. You can also use the pull-down next to the "Filter" box to view auto post-editing condition sets with the selected access setting.
Rename an auto post-editing condition set
To change the name of an auto post-editing condition set, double-click the name of the auto post-editing condition set or click ![]() in the "Set Name" column of the auto post-editing condition set list. After you rename it, press Enter or click
in the "Set Name" column of the auto post-editing condition set list. After you rename it, press Enter or click ![]() to save it.
to save it.
Control access to an auto post-editing condition set
Data managers can allow or deny specific users to access to an auto post-editing condition set. To control access to an auto post-editing condition set, select the pull-down item in the "Accessible to" column of the auto post-editing condition set list. There are three access types: All users, Private, and Specific group.
All users
To make the auto post-editing condition set accessible to all users, select "All users" from the pull-down in the "Accessible to" column. This allows all data managers to edit and view the auto post-editing condition set and all other users to only view it.
Private
To deny access to the auto post-editing condition set to anyone other than yourself, select "Only me (Private)" from the pull-down in the "Accessible to" column. This will prevent the auto post-editing condition set from appearing in the auto post-editing condition set list for other users other than yourself, and they will not be able to access to it.
Specific group
To make the auto post-editing condition set accessible to a specific group, select the user group from the pull-down in the "Accessible to" column. This allows only users who are registered as members of that user group to access to the auto post-editing condition set.
About user groups: User groups represent a group of specific users (e.g., department, project team, etc.). If you want to restrict access to an auto post-editing condition set to a specific user group, you need to create the user group and register a data manager as a member in advance.
* Data type:
- Glossary
- MT Prompt Set
- Auto Post-Editing Condition Set
- AI Prompt Set
- AI Proofing Rule Set
If the data manager is not registered as a member of the user group, they will not be able to select and allow that user group to access an auto post-editing condition set. For more information on creating user groups and registering members, see User group management function. You can also change who can access the auto post-editing condition set by adding or removing members from the user group after making the auto post-editing condition set accessible to the user group.
Delete an auto post-editing condition set
To delete an auto post-editing condition set, you must select the auto post-editing condition set by checking the checkbox at the beginning of the row in the auto post-editing condition set list. If you check the checkbox in the header of the auto post-editing condition set list, you can select all the auto post-editing condition sets. You can also deselect all auto post-editing condition sets by unchecking the box. After selecting an auto post-editing condition set, click the "Action" > "Delete" menu in the header menu. A confirmation screen will appear. Press the "OK" button.
Manage auto post-editing condition items
To register and manage auto post-editing condition items in an auto post-editing condition set, click the set name on the auto post-editing condition set management screen. Data managers can edit all auto post-editing condition sets they have access to, but other users can edit only auto post-editing condition sets they have created on their own. For more information on restricting access to auto post-editing condition sets, see Control access to an auto post-editing condition set.
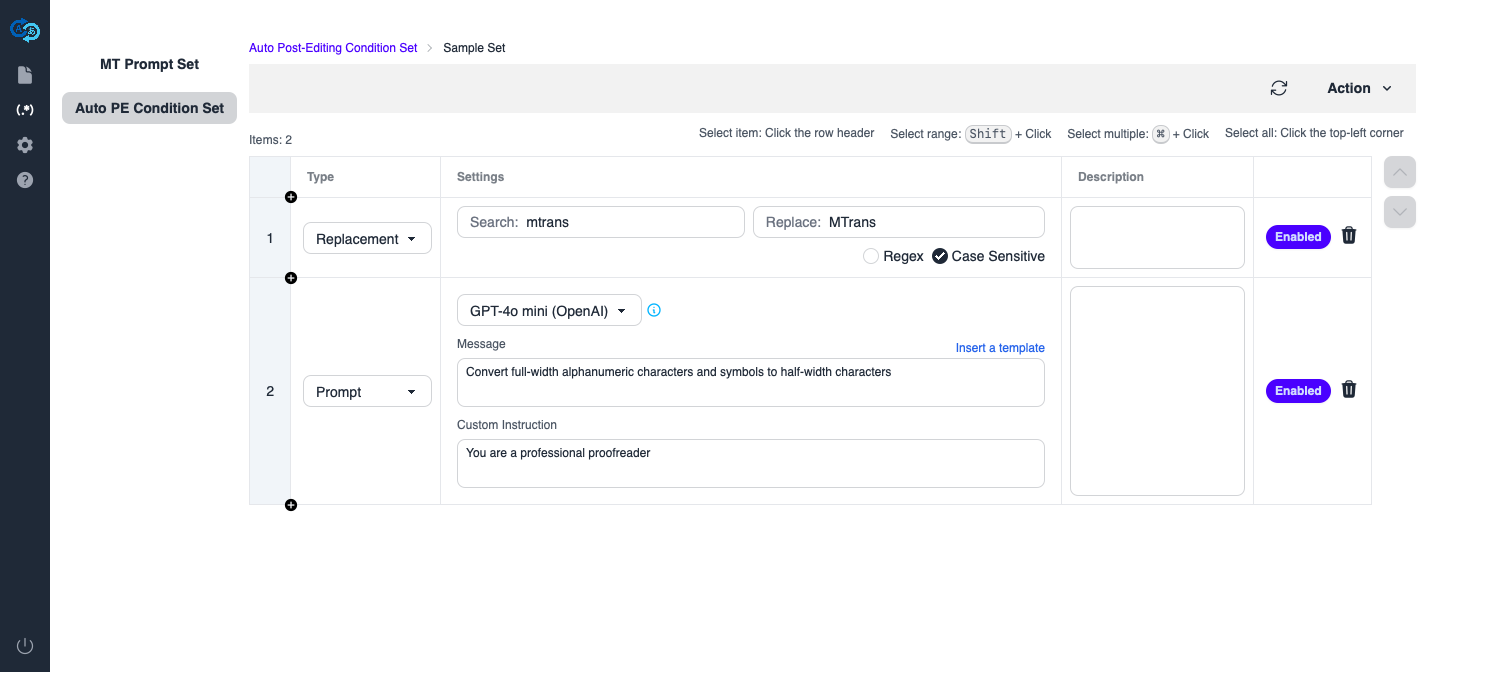
Register an auto post-editing condition item
To register an auto post-editing condition item, click ![]() at the beginning of each row in the list to insert a row. Select "Replacement" or "Prompt" in the "Type" column and enter the content of the item.
at the beginning of each row in the list to insert a row. Select "Replacement" or "Prompt" in the "Type" column and enter the content of the item.
Replacement condition
Search
Enter the text you want to search for. You can specify multiple texts using regular expressions. You can also specify whether to search with case sensitivity.
Replace
Enter the replacement text or select a command (select the input type using the radio buttons).
The following commands are available:
- Convert to Full Width
- Convert to Half Width
- Convert to Uppercase
- Convert to Lowercase
For example, when you use an AI proofing rule item with the "Convert to Uppercase" selected in the AI proofing function of MTrans for Office (XP version), the suggested correction will convert all matched text to uppercase.
Prompt
Select a generative AI model and enter instructions for the generative AI in the "Message" field. Enter the role you want the generative AI to play in the "Custom Instruction" field. For example, enter "Convert half-width characters to full-width characters" in the "Message" field and "You are a professional proofreader" in the "Custom Instruction" field. This will improve the performance of the generative AI.
Delete an auto post-editing condition item
To delete an auto post-editing condition item, click ![]() at the end of the line in the auto post-editing condition item list. A confirmation message will appear. Press the "OK" button. To delete multiple auto post-editing condition items at once, you must select the auto post-editing condition items by
at the end of the line in the auto post-editing condition item list. A confirmation message will appear. Press the "OK" button. To delete multiple auto post-editing condition items at once, you must select the auto post-editing condition items by Shift + clicking, Ctrl + clicking (for Windows), or ⌘ + clicking (for Mac) the beginning of the rows in the auto post-editing condition item list. If you click the header of the beginning of the rows of the auto post-editing condition item list, you can select all the auto post-editing condition items. You can also deselect all the auto post-editing condition items by clicking it again. After selecting auto post-editing condition items, click the "Action" > "Delete" menu in the header menu. A confirmation screen will appear. Press the "OK" button.
Enable or disable an auto post-editing condition item
By enabling or disabling an auto post-editing condition item, you can control whether it is applied when using the automatic post-editing feature in MTrans for Office. Clicking the "Enabled" button will switch the item to the disabled state (the button will also display "Disabled"), and clicking the "Disabled" button will switch the item to the enabled state (the button will also display "Enabled").
Swap auto post-editing condition items
To change the application order by swapping the auto post-editing condition items, click a row head to select the auto post-editing condition item, and click the "![]() " button or "
" button or "![]() " button next to the list to move the condition.
" button next to the list to move the condition.
AI prompt set management function
The AI prompt set management function manages prompts for the generative AI (hereafter referred to as AI prompts). Click in the sidebar and then click "AI Prompt Set" to access the AI prompt set management function. The registered AI prompts are available in the "AI Prompt" function of the following MTrans products.
- MTrans for Office (Mac/Web version)
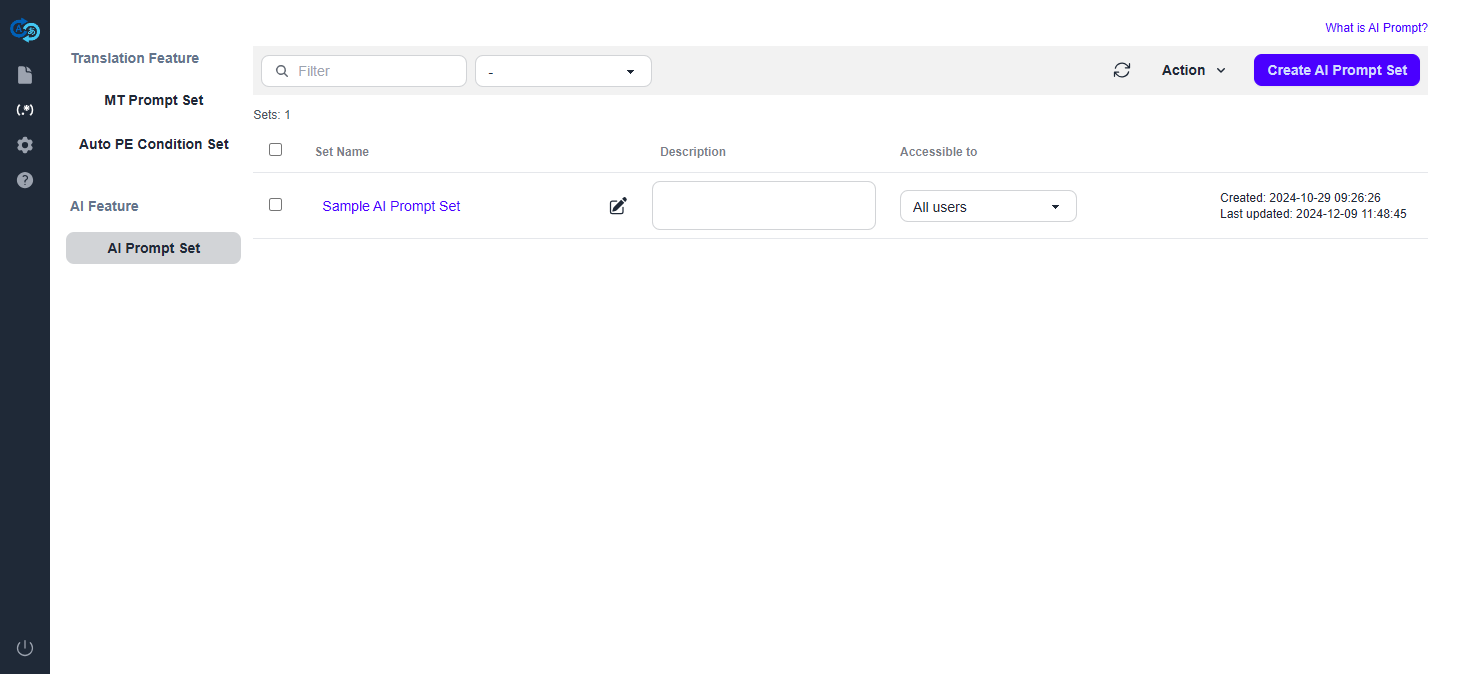
About the AI prompt set list view
When you open the AI prompt set management screen, the created AI prompt sets are displayed in a list format. However, private AI prompt sets or those accessible to a specific user group will not be displayed to users who are not authorized to access them. For more information on restricting access to AI prompt sets, see Control access to an AI prompt set.
Create an AI prompt set
To create an AI prompt set, click the "Create AI Prompt Set" button in the header menu. The input screen appears. Set the AI prompt set name and the access setting, then press the "Create" button. For more information about the access setting, see Control access to an AI prompt set.
Search for an AI prompt set
To search for an AI prompt set, type a keyword in the "Filter" box on the header menu. AI prompt sets that partially match the AI prompt set name or description will be displayed. You can also use the pull-down next to the "Filter" box to view AI prompt sets with the selected access setting.
Rename an AI prompt set
To change the name of an AI prompt set, double-click the name of the AI prompt set or click ![]() in the "Set Name" column of the AI prompt set list. After you rename it, press Enter or click
in the "Set Name" column of the AI prompt set list. After you rename it, press Enter or click ![]() to save it.
to save it.
Control access to an AI prompt set
Data managers can allow or deny specific users to access to an AI prompt set. To control access to an AI prompt set, select the pull-down item in the "Accessible to" column of the AI prompt set list. There are three access types: All users, Private, and Specific group.
All users
To make the AI prompt set accessible to all users, select "All users" from the pull-down in the "Accessible to" column. This allows all data managers to edit and view the AI prompt set and all other users to only view it.
Private
To deny access to the AI prompt set to anyone other than yourself, select "Only me (Private)" from the pull-down in the "Accessible to" column. This will prevent the AI prompt set from appearing in the AI prompt set list for other users other than yourself, and they will not be able to access to it.
Specific group
To make the AI prompt set accessible to a specific group, select the user group from the pull-down in the "Accessible to" column. This allows only users who are registered as members of that user group to access to the AI prompt set.
About user groups: User groups represent a group of specific users (e.g., department, project team, etc.). If you want to restrict access to an AI prompt set to a specific user group, you need to create the user group and register a data manager as a member in advance.
* Data type:
- Glossary
- MT Prompt Set
- Auto Post-Editing Condition Set
- AI Prompt Set
- AI Proofing Rule Set
If the data manager is not registered as a member of the user group, they will not be able to select and allow that user group to access an AI prompt set. For more information on creating user groups and registering members, see User group management function. You can also change who can access the AI prompt set by adding or removing members from the user group after making the AI prompt set accessible to the user group.
Delete an AI prompt set
To delete an AI prompt set, you must select the AI prompt set by checking the checkbox at the beginning of the row in the AI prompt set list. If you check the checkbox in the header of the AI prompt set list, you can select all the AI prompt sets. You can also deselect all AI prompt sets by unchecking the box. After selecting an AI prompt set, click the "Action" > "Delete" menu in the header menu. A confirmation screen will appear. Press the "OK" button.
Manage AI prompt items
To register and manage AI prompt items in an AI prompt set, click the set name on the AI prompt set management screen. Data managers can edit all AI prompt sets they have access to, but other users can edit only AI prompt sets they have created on their own. For more information on restricting access to AI prompt sets, see Control access to an AI prompt set.
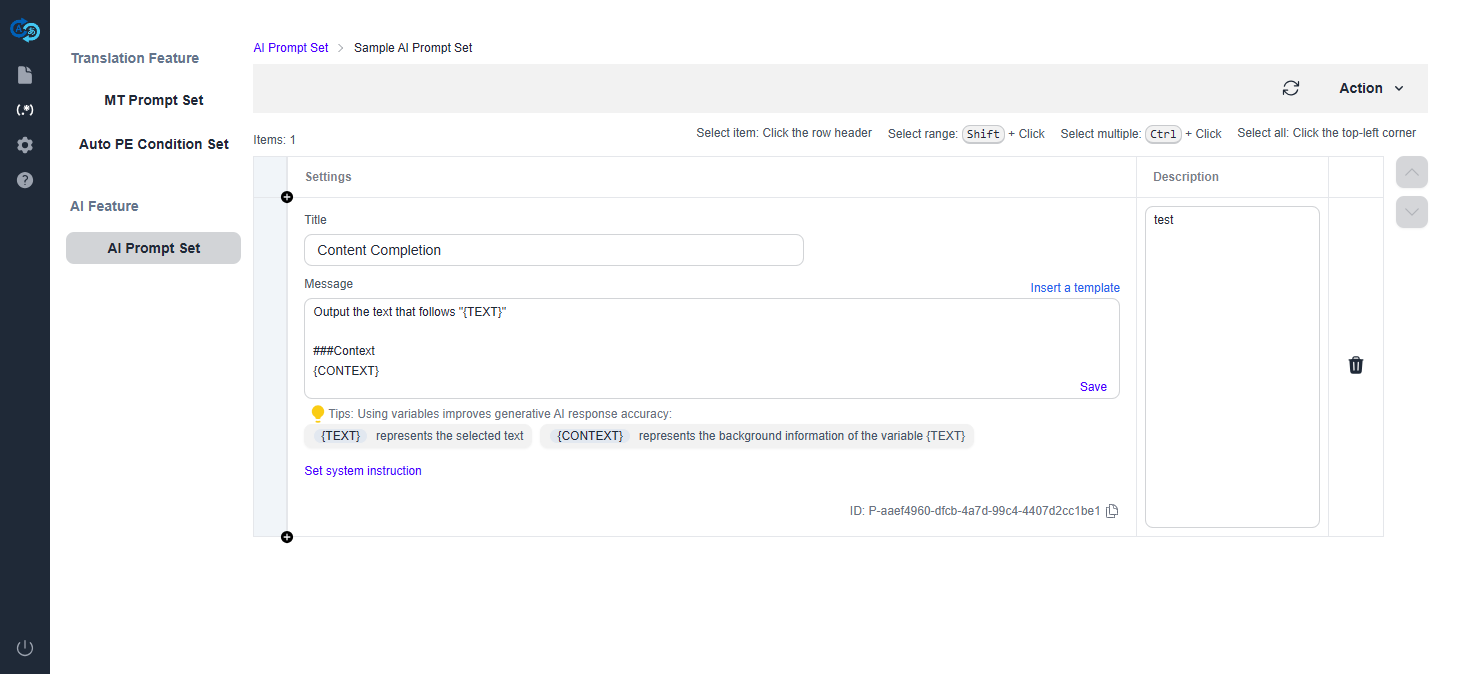
Register an AI prompt item
To register an AI prompt item, click ![]() at the beginning of each row in the list to insert a row. Enter a title of the AI prompt in the "Title" field. Enter an instruction for the generative AI in the "Message" field. Enter the role you want the generative AI to play in the "Custom Instruction" field.
at the beginning of each row in the list to insert a row. Enter a title of the AI prompt in the "Title" field. Enter an instruction for the generative AI in the "Message" field. Enter the role you want the generative AI to play in the "Custom Instruction" field.
Example of an AI prompt
- Title: "Content Completion"
- Message:
Output the text that follows "{TEXT}"

### Context
{CONTEXT}
About variables
When you use the following variables in the "Message" field, you can give more specific instructions to the generative AI.
{TEXT}: the text to be processed.{CONTEXT}: the context of the text to be processed. The content varies depending on the execution environment of the AI prompt function.- MTrans for Office (Mac/Web version)
- Word / Outlook: The text for the whole document is set.
- Excel / PowerPoint: Not set.
- MTrans for Office (Mac/Web version)
Delete an AI prompt item
To delete an AI prompt item, click ![]() at the end of the line in the AI prompt item list. A confirmation message will appear. Press the "OK" button. To delete multiple AI prompt items at once, you must select the AI prompt items by
at the end of the line in the AI prompt item list. A confirmation message will appear. Press the "OK" button. To delete multiple AI prompt items at once, you must select the AI prompt items by Shift + clicking, Ctrl + clicking (for Windows), or ⌘ + clicking (for Mac) the beginning of the rows in the AI prompt item list. If you click the header of the beginning of the rows of the AI prompt item list, you can select all the AI prompt items. You can also deselect all the AI prompt items by clicking it again. After selecting AI prompt items, click the "Action" > "Delete" menu in the header menu. A confirmation screen will appear. Press the "OK" button.
Swap AI prompt items
To change the application order by swapping the AI prompt items, click a row head to select the AI prompt item, and click the "![]() " button or "
" button or "![]() " button next to the list to move the prompt.
" button next to the list to move the prompt.
AI proofing rule set management function

The AI proofing rule set management function manages proofing rules using generative AI (hereafter referred to as AI proofing rules) for automated document proofing (tone consistency, terminology consistency, style adjustment, resolving notation inconsistencies, etc.). Click in the sidebar and then click "AI Proofing Rule Set" to access the AI proofing rule set management function. The registered AI proofing rule sets are available in the following MTrans products:
- MTrans for Office (Mac/Web version) - Word only
About the AI proofing rule set list view
When you open the AI proofing rule set management screen, the created AI proofing rule sets are displayed in a list format. However, private AI proofing rule sets or those accessible to a specific user group will not be displayed to users who are not authorized to access them. For more information on restricting access to AI proofing rule sets, see Control access to an AI proofing rule set.
Create an AI proofing rule set
To create an AI proofing rule set, click the "Create AI Proofing Rule Set" button in the header menu. The input screen appears. Set the AI proofing rule set name and the access setting, then press the "Create" button. For more information about the access setting, see Control access to an AI proofing rule set.
Search for an AI proofing rule set
To search for an AI proofing rule set, type a keyword in the "Filter" box on the header menu. AI proofing rule sets that partially match the AI proofing rule set name or description will be displayed. You can also use the pull-down next to the "Filter" box to view AI proofing rule sets with the selected access setting.
Rename an AI proofing rule set
To change the name of an AI proofing rule set, double-click the name of the AI proofing rule set or click ![]() in the "Set Name" column of the AI proofing rule set list. After you rename it, press Enter or click
in the "Set Name" column of the AI proofing rule set list. After you rename it, press Enter or click ![]() to save it.
to save it.
Control access to an AI proofing rule set
Data managers can allow or deny specific users to access to an AI proofing rule set. To control access to an AI proofing rule set, select the pull-down item in the "Accessible to" column of the AI proofing rule set list. There are three access types: All users, Private, and Specific group.
All users
To make the AI proofing rule set accessible to all users, select "All users" from the pull-down in the "Accessible to" column. This allows all data managers to edit and view the AI proofing rule set and all other users to only view it.
Private
To deny access to the AI proofing rule set to anyone other than yourself, select "Only me (Private)" from the pull-down in the "Accessible to" column. This will prevent the AI proofing rule set from appearing in the AI proofing rule set list for other users other than yourself, and they will not be able to access to it.
Specific group
To make the AI proofing rule set accessible to a specific group, select the user group from the pull-down in the "Accessible to" column. This allows only users who are registered as members of that user group to access to the AI proofing rule set.
About user groups: User groups represent a group of specific users (e.g., department, project team, etc.). If you want to restrict access to an AI proofing rule set to a specific user group, you need to create the user group and register a data manager as a member in advance.
* Data type:
- Glossary
- MT Prompt Set
- Auto Post-Editing Condition Set
- AI Prompt Set
- AI Proofing Rule Set
If the data manager is not registered as a member of the user group, they will not be able to select and allow that user group to access an AI proofing rule set. For more information on creating user groups and registering members, see User group management function. You can also change who can access the AI proofing rule set by adding or removing members from the user group after making the AI proofing rule set accessible to the user group.
Delete an AI proofing rule set
To delete an AI proofing rule set, you must select the AI proofing rule set by checking the checkbox at the beginning of the row in the AI proofing rule set list. If you check the checkbox in the header of the AI proofing rule set list, you can select all the AI proofing rule sets. You can also deselect all AI proofing rule sets by unchecking the box. After selecting an AI proofing rule set, click the "Action" > "Delete" menu in the header menu. A confirmation screen will appear. Press the "OK" button.
Import an AI proofing rule set
To import an AI proofing rule set, follow the steps below.
- From the header menu in the upper right, click "Action" > "Import". The import screen appears.
- Click the "Download template" button in the upper right to obtain the Excel template (.xlsx).
- Open the template and, following the "Import Procedure" described on the "Settings" sheet, enter the data. For details of each input item, see Register an AI proofing rule item and Set proof targets.
- Drag and drop the file onto the upload panel on the import screen or click to select the file and upload it.
- Set the access setting and click the "Import" button to start importing.
- When the import is complete, you will be notified by email.
Export an AI proofing rule set
To export an AI proofing rule set, follow the steps below.
- Select the AI proofing rule set you want to export.
- From the header menu in the upper right, click "Action" > "Export".
- Keep the screen open and wait a moment. When the export is complete, the download will start. The exported file is in Excel format (.xlsx) and contains the AI proofing rule set contents.
Manage AI proofing rule items

To register and manage AI proofing rule items in an AI proofing rule set, click the set name on the AI proofing rule set management screen. Data managers can edit all AI proofing rule sets they have access to, but other users can edit only AI proofing rule sets they have created on their own. For more information on restricting access to AI proofing rule sets, see Control access to an AI proofing rule set.
Register an AI proofing rule item
To register an AI proofing rule item, click ![]() at the beginning of each row in the list to insert a row. Select "Replacement" or "Prompt" in the "Type" column and enter the content of the item.
at the beginning of each row in the list to insert a row. Select "Replacement" or "Prompt" in the "Type" column and enter the content of the item.
Replacement condition
Search
Enter the text you want to search for. You can specify multiple texts using regular expressions. You can also specify whether to search with case sensitivity.
Replace
Enter the replacement text or select a command (select the input type using the radio buttons).
The following commands are available:
- Convert to Full Width (Command) (
to-full-width) - Convert to Half Width (Command) (
to-half-width) - Convert to Uppercase (Command) (
to-uppercase) - Convert to Lowercase (Command) (
to-lowercase)
For example, when you use an AI proofing rule item with the "Convert to Uppercase (Command)" selected in the AI proofing function of MTrans for Office (XP version), the suggested correction will convert all matched text to uppercase.
Prompt
Enter the prompt title in the "Title" field, select a generative AI model, and enter proofing instructions in the "Message" field. Enter the role you want the generative AI to play in the "Custom Instruction" field. This will improve the performance of the generative AI.
Example:
- Title: "Terminology Harmonization"
- Message: "Standardize specialized terminology according to the guideline"
- Custom Instruction: "You are a proofreader well-versed in the in-house style guide"
The AI proofing rule set also has a proofing unit. The proofing unit specifies the text range applied in one proofing.
| Proofing unit | Description |
|---|---|
| Whole | Proofs the entire document in one process. Select this when checking consistency of terms throughout the document. |
| Page | Proofs page by page. Splitting the scope from whole document to page can help improve proofing accuracy. Recommended when checking specific terms or expressions in documents with many pages. |
Processing flow when the proofing unit is "Whole Document"
Processing flow when the proofing unit is "Page"
Set proof targets
In an AI proofing rule set, you can set a proof target for each item. By setting a proof target, you can proof only specific types of text. Select the proof target from the list in the "Proof Targets" column.
| Proof target | Description |
|---|---|
| All | Targets all text.* |
| Title | Targets text with the "Title" style set in Word. |
| Table of Contents | Targets text with the "Table of Contents" style set in Word. |
| Heading | Targets text with the "Heading" style set in Word. |
| Body | Targets text other than title, table of contents, heading, table, and list. |
| Table | Targets text inside tables. |
| List | Targets text inside lists. |
| Shape | Targets text inside shapes. |
Delete an AI proofing rule item
To delete an AI proofing rule item, click ![]() at the end of the line in the AI proofing rule item list. A confirmation message will appear. Press the "OK" button. To delete multiple AI proofing rule items at once, you must select the AI proofing rule items by
at the end of the line in the AI proofing rule item list. A confirmation message will appear. Press the "OK" button. To delete multiple AI proofing rule items at once, you must select the AI proofing rule items by Shift + clicking, Ctrl + clicking (for Windows), or ⌘ + clicking (for Mac) the beginning of the rows in the AI proofing rule item list. If you click the header of the beginning of the rows of the AI proofing rule item list, you can select all the AI proofing rule items. You can also deselect all the AI proofing rule items by clicking it again. After selecting AI proofing rule items, click the "Action" > "Delete" menu in the header menu. A confirmation screen will appear. Press the "OK" button.
Swap AI proofing rule items
To change the application order by swapping the AI proofing rule items, click a row head to select the AI proofing rule item, and click the "![]() " button or "
" button or "![]() " button next to the list to move the item.
" button next to the list to move the item.
Revision history
April 15, 2026
- Added "Export an AI proofing rule set"
January 26, 2026
- Added a command explanation to "Replacement condition" in "Register an AI proofing rule item"
- Added "Shape" to the proof target list in "Set proof targets"
November 4, 2025
- Added the "AI proofing rule set management function" and related items
August 1, 2025
- Changed the name of the user privilege "User Manager" to "Data Manager"
April 28, 2025
- Added that MTrans Web can use MT prompts in the "MT prompt set management function"
- Added that MTrans Web can use auto post-editing conditions in the "Auto post-editing condition set management function"
December 20, 2024
- Added the "AI prompt set management function" and "Manage AI prompt items"
October 21, 2024
- Changed the name of the "Prompt and replacement condition set management function" to the "Auto post-editing condition set management function"
- Added the "MT prompt set management function"
August 20, 2024
- Updated the generative AI models that can be set to prompts
July 25, 2024
- Added that users other than data managers can create and edit private "prompt and replacement condition" sets
June 25, 2024
- Created