MTrans for Office (XP version) User Guide
- About MTrans for Office
- Windows version and XP (Cross Platform) version
- Supported MT engines / LLMs (Large Language Models)
- Getting MTrans for Office (XP version)
- Using MTrans for Office (XP version)
- Logging in
- Translating with Word, Excel, and PowerPoint
- Translating a selection of text
- Translating using glossaries
- Post-editing automatically
- Revising translation with AI (AI assistant function)
- Checking translation results before and after editing
- Downloading translation results
- Translating automatically
- Translating including formatting
- Changing text size
- Translating a whole document
- Translating a sheet in Excel
- Translating slides in PowerPoint
- Translating with Outlook
- Translating a selection of text
- Translating using glossaries
- Post-editing automatically
- Translating automatically
- Revising translation with AI (AI assistant function)
- Checking translation results before and after editing
- Downloading translation results
- Translating including formatting
- Changing text size
- Translating a whole e-mail
- Using generative AI (AI prompt function)
- Proofing Word documents (AI Proofing function)
- Other settings
- Limitations / Known Issues
- Support
- Revision history
About MTrans for Office
MTrans for Office is a machine translation add-in developed as an extension of Microsoft Office applications. By using MTrans for Office, you can easily use the machine translation function and generative AI (AI prompt function) in Word, Excel, PowerPoint and Outlook.
Windows version and XP (Cross Platform) version
MTrans for Office is available in two versions: the Windows version and the XP (Cross-Platform) version.
The Windows version of MTrans for Office supports only Office for Windows, while the XP version supports Office for Windows, Office for Mac, and Office for Web browsers.
The Windows version is developed using VSTO (Visual Studio Tools for Office), enabling advanced features that allow for detailed control over Office for Windows—for example, translations can be performed while preserving formatting and layout with higher precision.
On the other hand, the XP version is developed using the Office JavaScript API, enabling cross-platform functionality on Office for Windows, Office for Mac, and Office for Web browsers.
Please note that the Windows version of MTrans for Office cannot be used with the new Outlook UI; only the XP version is supported for Outlook (new UI).
Supported MT engines / LLMs (Large Language Models)
The machine translation function of MTrans for Office (XP version) uses the machine translation APIs (hereinafter referred to as MT engines).
| Vendor | MT engine name and edition/plan | Official document |
|---|---|---|
| Cloud Translation - Advanced (v3) | https://cloud.google.com/translate/docs?hl=en | |
| DeepL | DeepL API Pro | https://www.deepl.com/en/docs-api |
| Microsoft | Microsoft Translator | https://learn.microsoft.com/en-us/azure/ai-services/translator/ |
| OpenAI | GPT-4.1 | https://platform.openai.com/docs/models |
The AI prompt function of MTrans for Office (XP version) uses the generative AI APIs (hereinafter referred to as LLMs (Large Language Models)).
| Vendor | LLM name and edition/plan | Official document |
|---|---|---|
| OpenAI | GPT-4.1 | https://platform.openai.com/docs/models |
| GPT-5 |
Getting MTrans for Office (XP version)
Where to get MTrans for Office and add-in name
MTrans for Office (XP version) is published on Microsoft Marketplace, an online store by Microsoft, at https://marketplace.microsoft.com. On Microsoft Marketplace, the add-in name for Word, Excel, and PowerPoint is different from the add-in name for Outlook.
| Word / Excel / PowerPoint | Outlook |
|---|---|
| MTrans for Office | MTrans for Outlook |
Steps to get MTrans for Office (for Word, Excel, and PowerPoint)
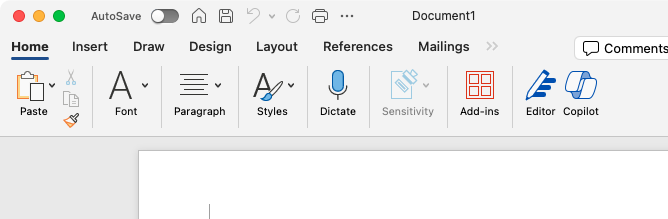
- Click "Home" > "Add-ins" from the menu to open the panel, and then click "More Add-ins" to open the "Office Add-ins" screen.
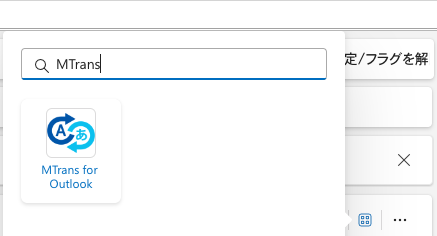
- Open the "STORE" tab, enter "mtrans" in the search box, and perform a search.
- "MTrans for Office" will be displayed in the search results list. Click the "Add" button.
- Confirm that the "MTrans" tab has been added to the ribbon menu. It is done.

Steps to get MTrans for Office (for Outlook)
For the Mac version
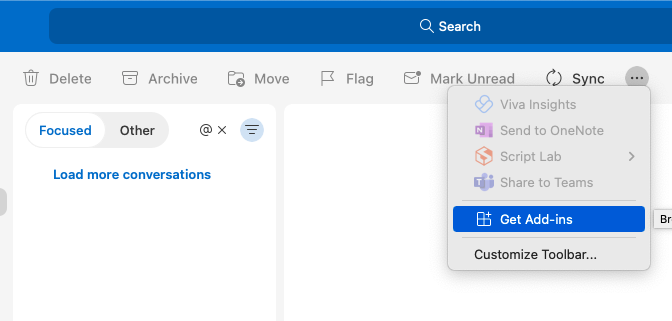
- Click "Get Add-ins" from the menu to open the "Add-Ins for Outlook" screen.
- Open the "All" tab, enter "mtrans" in the search box, and perform a search.
- "MTrans for Outlook" will be displayed in the search results list. Click the "Add" button.
- Confirm that the "MTrans" has been added to the menu. It is done.

For the web browser version and the Windows version (new UI)
- Click the "Apps" button in the side menu to open the "Apps" screen.
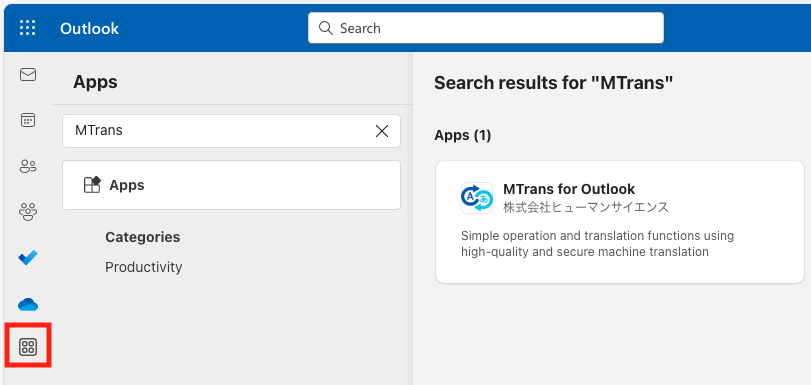
- Enter "MTrans" in the search box, and "MTrans for Outlook" will be displayed in the search results.
- Click "MTrans for Outlook" and then click the "Open" button.
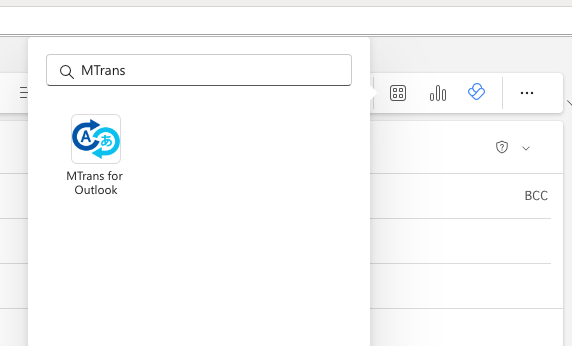
- Click the "New mail" button at the top left of the screen to open the draft creation screen, and click the "Message" menu > "Apps" button. The app panel will be displayed, and confirm that "MTrans for Outlook" is available. It is done.
The add-ins are also available by accessing Microsoft Marketplace (https://marketplace.microsoft.com) from a browser. In addition, they can be centrally deployed to Office users by administrators from the Microsoft 365 admin center (https://admin.microsoft.com).
However, to get the add-ins for Outlook by these methods, a Microsoft 365 subscription including Exchange is required. Customers with subscriptions such as "Microsoft 365 Apps for business" cannot get the add-ins for Outlook by these methods, so please get them by the above steps.
Using MTrans for Office (XP version)
Using MTrans for Office with Word, Excel, and PowerPoint
MTrans for Office is available from the "MTrans" tab in the ribbon menu.
Using MTrans for Office with Outlook
For the Mac version
With an incoming email or draft email selected, click "MTrans" in the menu.
For the web browser version and the Windows version (new UI)
- When translating an incoming email: Select an incoming email, click the "Apps" button in the upper right corner of the message screen, and click "MTrans for Outlook" in the menu.
- When translating a draft : Click the "Message" menu > "Apps" button, and click "MTrans for Outlook" in the menu.
Logging in
User authentication is required to use MTrans for Office. When you click any of the ribbon buttons "Translate", "AI Prompt", or "AI Proofing" while not logged in, the login panel will appear from the right side of the screen. Enter your MTrans user account (registered in MTrans Online (https://mtrans.online)) and click the "Login" button.
For customers logging in using Single Sign-On (SSO), click the "Single Sign-On (SSO)" button. A dialog box will appear, enter your app client ID, and click the confirm button (![]() ).
).
You can check your app client ID on the My Account page in MTrans Online (https://mtrans.online/settings/my-account ).
After logging in with the account of the linked service, the dialog will close and MTrans for Office will be available.
If your browser is Safari, you will need to click the "Single Sign-On (SSO)" button again after you log in with SSO and the dialog closes.
Forgot your password?
Please click "Forgot your password?". The browser will display a password reset screen for your MTrans user account. Follow the instructions on the screen to reset your password. Customers who log in using Single Sign-On (SSO) cannot reset their password from "Forgot your password?". You need to check this with the linked service.
Logging out
Click the "⋮" button at the bottom right of the screen and then click the "Logout" menu to log out.
Translating with Word, Excel, and PowerPoint
Click the "Translate" button (![]() ) on the ribbon menu to display the translation panel from the right side of the screen. If you are not logged in, the login panel will be displayed first; after logging in, the translation panel appears.
) on the ribbon menu to display the translation panel from the right side of the screen. If you are not logged in, the login panel will be displayed first; after logging in, the translation panel appears.
Translating a selection of text
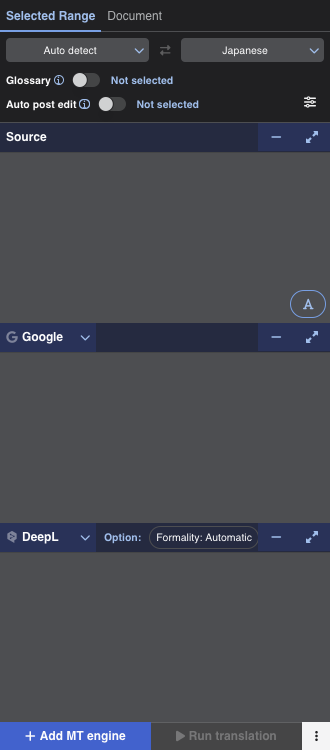
To translate text in a document, click the "Selected Range" tab on the translation panel. When you select text, it will be read as source text. After setting the source language, target language, and selecting the MT engine, click "▶ Run translation" to start the translation and display the translated text.

Readable text
In Word, MTrans can read a paragraph or a range of selected text where the cursor is placed. It can also read some shapes.
In Excel, MTrans can read a range of selected cells. However, if multiple cells are individually selected instead of a range selection, they will not be read.
In PowerPoint, MTrans can read the text box or range-selected text where the cursor is placed.
Source language
A list of source languages supported by the selected MT engine is displayed. If you select "Auto detect", the MT engine will determine the source language.
The "Auto detect" might not be able to detect the language correctly depending on the source text. If the translation is not correct, please set the source language manually and translate again.
Target language
A list of target languages supported by the selected MT engine is displayed.
Swapping source language and target language
To swap the source and target languages, click the "![]() " button.
" button.
If you select multiple MT engines and perform simultaneous translation, icons will be displayed at the right end of the language list.
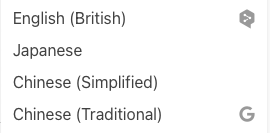
These indicate the support status for each MT engine, and languages that are supported by only some MT engines are marked with an icon for that MT engine.
Languages without icons can be translated by all MT engines currently selected.
If a language with an icon is used, there may be cases where translation fails with an MT engine other than the one represented by the icon.
| Icon | MT engine |
|---|---|
 |
|
 |
DeepL |
 |
Microsoft |
 |
OpenAI |
MT engine
Select Google, DeepL, Microsoft, or OpenAI. DeepL and OpenAI have optional settings.
DeepL option
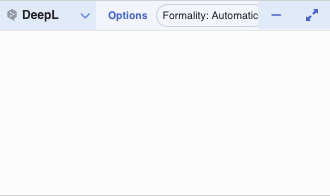
Select "DeepL" for the MT engine and click on "Options" to set formal or informal tone for some target languages.
Note: When translating into Japanese, the settings are plain/polite.
Please refer to the DeepL Help Center for more information.
- About the formal/informal feature - DeepL Help Center
- About the plain/polite feature in Japanese - DeepL Help Center
OpenAI options
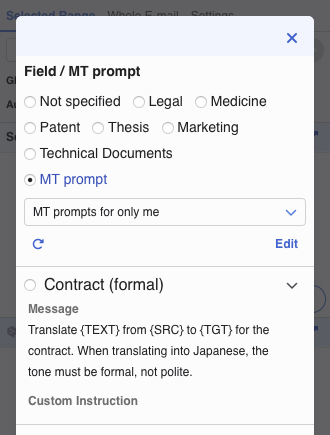
Select "OpenAI" for the MT engine and click on "Options" to set the field for translation or translation instructions (MT prompts) created in MTrans Online. By utilizing this option setting, you can have a higher possibility of obtaining optimal translation results. Please refer to the MTrans Online User Guide for information on managing MT prompts.
Edit buttons
Common buttons (for Word, Excel, PowerPoint)
- "Replace" button: The read source text will be replaced with the translated text.
- "Copy" button: The translated text will be copied to the clipboard.
Word only
- "Insert" button: The translated text will be inserted after the read source text.
Excel only
- "Insert right" button: New columns will be inserted to the right of the read source text columns, and the translated text will be output.
- "Overwrite right" button: The columns to the right of the read source text columns will be overwritten with the translated text.
- "Insert below" button: New rows will be inserted below the read source text rows, and the translated text will be output.
- "Overwrite below" button: The rows below the read source text rows will be overwritten with the translated text.
"Add MT engine" button
You can add another MT engine to translate simultaneously.
Translating using glossaries
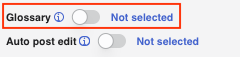
You can translate using glossaries created in MTrans Online. Click the "Glossary" toggle button to turn it on, and click the "No glossary selected" link. The glossary list dialog will be displayed, so select the glossaries you want to use.
Glossary list dialog
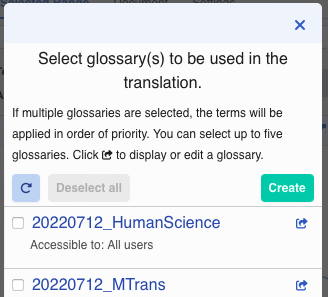
You can select up to five glossaries created in MTrans Online and apply them to the translation.
Please refer to the MTrans Online User Guide for information on managing glossaries.
Reloading the glossary list
You can reload the glossary list by clicking the "![]() " button after editing glossaries in MTrans Online.
" button after editing glossaries in MTrans Online.
Creating a new glossary
Click the "Create" button to display the glossary creation screen in MTrans Online.
Displaying or editing the glossary
Click the "![]() " button to open MTrans Online and display/edit the contents of each glossary.
" button to open MTrans Online and display/edit the contents of each glossary.
Setting priority
If there are duplicate terms among the selected glossaries, the terms from the glossary with a higher priority (lower number) will take precedence.
Post-editing automatically
Automatic post-editing is a function that automatically corrects translation results. This function allows you to unify the expression of the translated text or change it to an expression that follows a style guide.
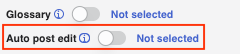
You can use the automatic post-editing condition sets created in MTrans Online to perform automatic post-editing. Click the "Auto post edit" toggle button to turn it on, and click the "Not selected" link. A dialog will be displayed, so select the automatic post-editing condition sets you want to use.
Automatic post-editing condition set list dialog
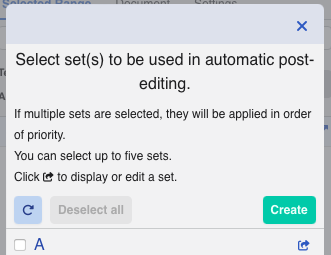
You can select up to five automatic post-editing condition sets created in MTrans Online and apply them to the translation. For information on managing automatic post-editing condition sets, please refer to the MTrans Online User Guide.
Reloading the automatic post-editing condition set list
You can reload the automatic post-editing condition set list by clicking the "![]() " button after editing the automatic post-editing condition sets in MTrans Online.
" button after editing the automatic post-editing condition sets in MTrans Online.
Creating a new automatic post-editing condition set
Click the "Create" button to display the automatic post-editing condition set creation screen in MTrans Online.
Displaying or editing the automatic post-editing condition set
Click the "![]() " button to open MTrans Online and display/edit the contents of each automatic post-editing condition set.
" button to open MTrans Online and display/edit the contents of each automatic post-editing condition set.
Setting priority
If there are duplicate items among the selected automatic post-editing condition sets, the items from the automatic post-editing condition set with a higher priority (lower number) will take precedence.
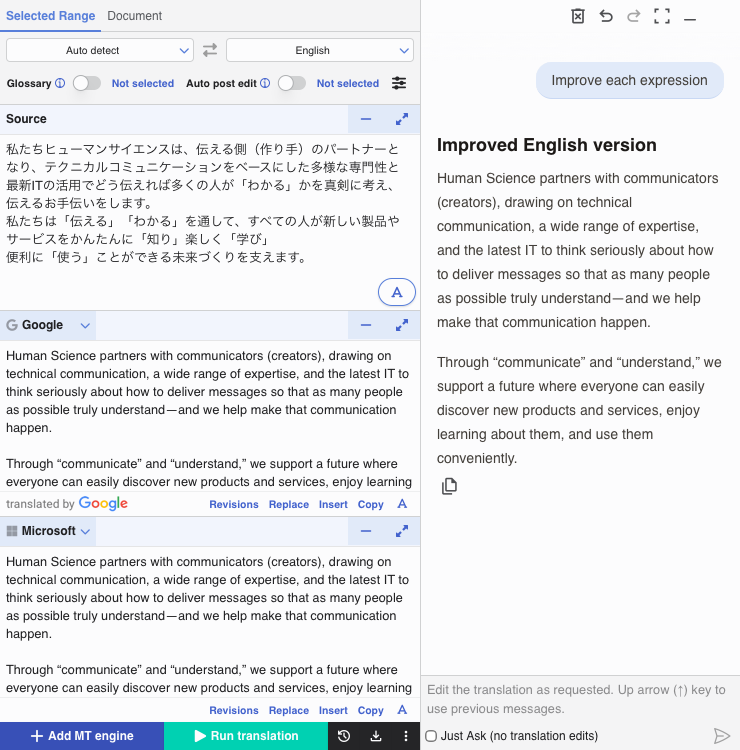
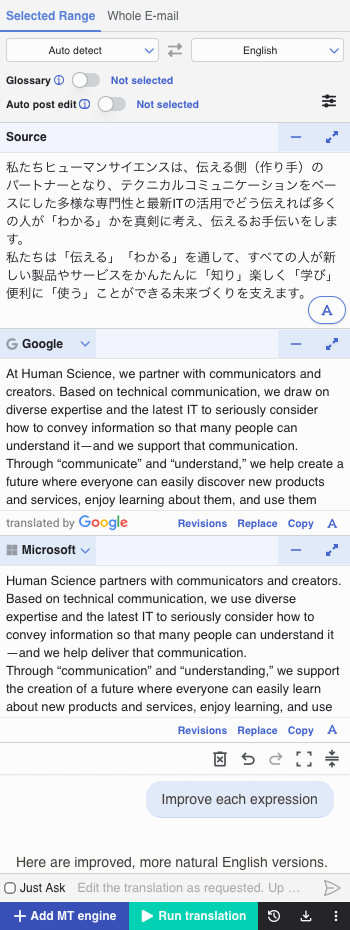
Revising translation with AI (AI assistant function)
The AI assistant function allows you to improve translation results while interacting with generative AI. Depending on the instructions you provide, generative AI can revise translation results or answer questions about the translation. The generative AI model used is OpenAI's GPT-5.2, although the model version may change depending on the situation.
Using the AI assistant function
To use the AI assistant function, enter a message in the chat input field. The chat input field is placed above the bottom menu, or at the bottom of the chat panel if the panel is displayed on the right side of the add-in screen. After entering your message, click ![]() or press Ctrl + Enter (Windows) or Command + Enter (Mac) to send it. When a reply is received from generative AI, the translation result is revised based on the response, or an answer to your question is displayed in the chat panel.
or press Ctrl + Enter (Windows) or Command + Enter (Mac) to send it. When a reply is received from generative AI, the translation result is revised based on the response, or an answer to your question is displayed in the chat panel.
| Item | Description |
|---|---|
| "Just Ask" checkbox |
If checked, generative AI will not revise the translation result. Only an answer to your question will be displayed in the chat panel. |
If the chat panel is displayed at the bottom of the add-in screen, the following buttons are available.
| Item | Description |
|---|---|
| Clears all interactions shown in the chat panel. This does not affect the translation result. | |
| Undoes the last interaction. This does not affect the translation result. | |
| Restores an interaction that was undone. This does not affect the translation result. | |
| Switches the chat panel to full-screen view. | |
| Expands the chat panel and places it on the right side of the add-in screen. This button is available only when the add-in screen width is 500 px or more. It is not available in Outlook for Mac. |
|
| Makes the chat panel a little taller. | |
| Makes the chat panel smaller. |
If the chat panel is displayed on the right side of the add-in screen, the following buttons are available.
| Item | Description |
|---|---|
| Clears all interactions shown in the chat panel. This does not affect the translation result. | |
| Undoes the last interaction. This does not affect the translation result. | |
| Restores an interaction that was undone. This does not affect the translation result. | |
| Switches the chat panel to full-screen view. | |
| Minimizes the chat panel and places it at the bottom of the add-in screen. |
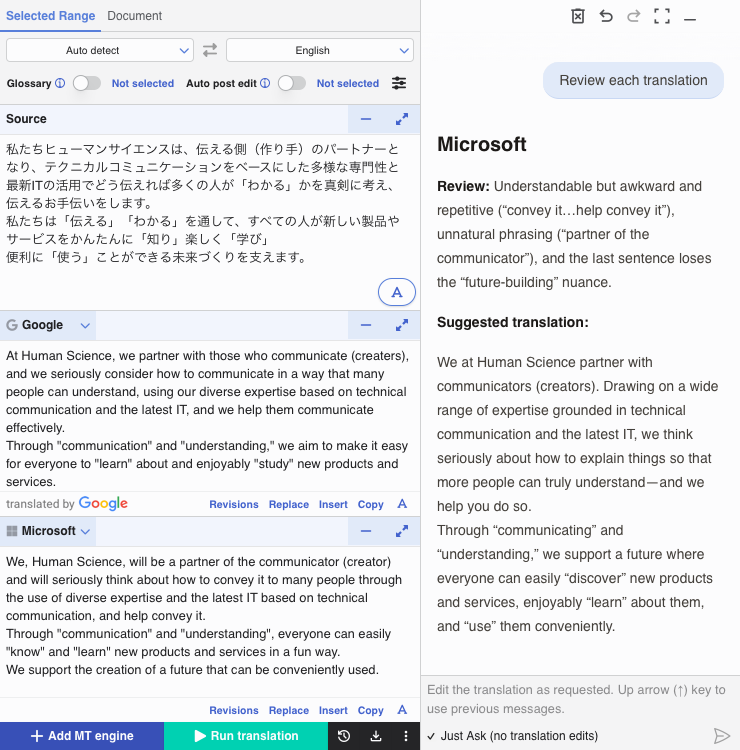
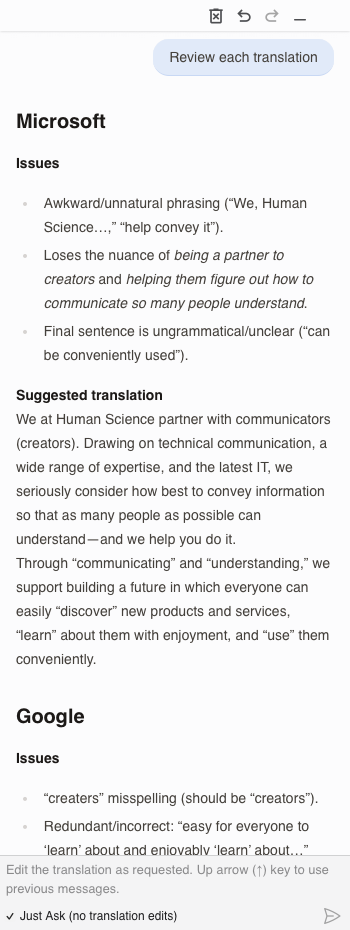
Making the most of the AI assistant function
With the AI assistant function, you can get feedback on translation results. Also, if you translate with multiple MT engines, you can ask it to compare them by giving an instruction such as "Review each translation."
Checking translation results before and after editing
This function lets you check translation results before and after editing. You can review the initial translation result from the MT engine, the result after applying glossaries, the result after automatic post-editing, and the result after revisions made by the AI assistant function. This function is not available in Excel.
![]()
Click the "Revisions" button in the target text panel to display the translation history menu. Hover over any menu item to preview the translation result from that point in the target text panel. Click a menu item to apply it.
All translation history
Click ![]() in the bottom menu to display the translation history menu for each MT engine's translation result. Hover over any menu item to preview the translation result from that point in each target text panel. Click a menu item to apply it.
in the bottom menu to display the translation history menu for each MT engine's translation result. Hover over any menu item to preview the translation result from that point in each target text panel. Click a menu item to apply it.
Downloading translation results
Click ![]() in the bottom menu to copy or download the source and target text. Use this when you want to compare the translation results from each MT engine or compare results before and after processing. This function is not available in Excel.
in the bottom menu to copy or download the source and target text. Use this when you want to compare the translation results from each MT engine or compare results before and after processing. This function is not available in Excel.
| Item | Description |
|---|---|
| Source text and translations displayed | Copy or download the source text and target text currently displayed on the screen. You can output them in CSV or JSON format. |
| All translations in the history | Copy or download the source text currently displayed on the screen and all target texts in the translation history. You can output them in CSV or JSON format. |
Translating automatically
Click the "![]() " button to open the settings screen. Turn on the "Translate automatically" checkbox. This will allow you to translate automatically when you select text.
" button to open the settings screen. Turn on the "Translate automatically" checkbox. This will allow you to translate automatically when you select text.
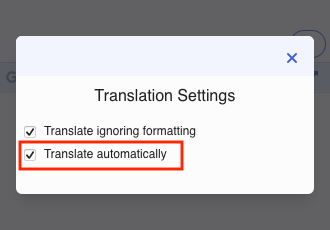
Translating including formatting
Click the "![]() " button to open the settings screen. Turn off the "Translate ignoring formatting" checkbox. This will allow you to translate including some formatting.
" button to open the settings screen. Turn off the "Translate ignoring formatting" checkbox. This will allow you to translate including some formatting.

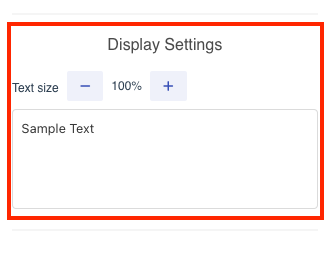
Changing text size
Click on the "Settings" menu from the "⋮" button at the bottom right of the screen to open the settings screen. Click the "-" or "+" button in "Display Settings" > "Text size" to change the text size.
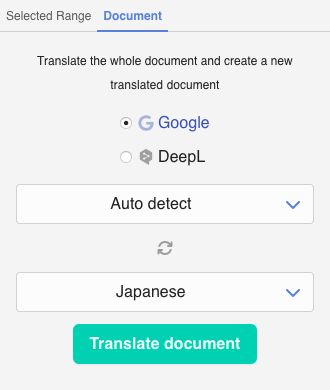
Translating a whole document
To translate a whole document, click the "Document" tab on the translation panel.
After selecting the MT engine and setting the source and target languages, click the "Translate" button to start the translation.
MT engine
Select Google or DeepL.
Source language
A list of source languages supported by the selected MT engine is displayed. If you select "Auto detect", the MT engine will determine the source language. DeepL does not support "Auto detect" in Word and PowerPoint.
The "Auto detect" might not be able to detect the language correctly depending on the source text. If the translation is not correct, please set the source language manually and translate again.
Target language
A list of target languages supported by the selected MT engine is displayed.
Swapping source language and target language
To swap the source and target languages, click the "![]() " button.
" button.
"Translate" button
When you click the "Translate" button on the translation panel, the contents of the whole document will be read and translated by the specified MT engine. Once the translation has started, do not close the panel and wait until it is completed.
Please note that depending on the specifications of each MT engine, some content such as images and graphs may not be translated, or translation may fail due to the inclusion of such content.
When translating with the Windows version or the Mac version
Once the translation is complete, the target file will be displayed in a new window.
When translating with the web version
Once the translation is complete, a dialog appears with the message "This Add-In is about to create a new document in your default folder on your current cloud repository." Click "Yes". Then another dialog appears with the message "This Add-In is about to display a new window." Click "Yes". A new tab will be created on the right, and the translated file will be displayed in that tab. The translation file will be saved in the "My files" folder in OneDrive.
Translating a sheet in Excel
In Excel, you can translate cells in an active sheet in bulk. Click the "Sheet" tab on the translation panel, set an MT engine, source language, target language, glossaries, automatic post-editing condition sets, and the translation output, and then click "Translate sheet".
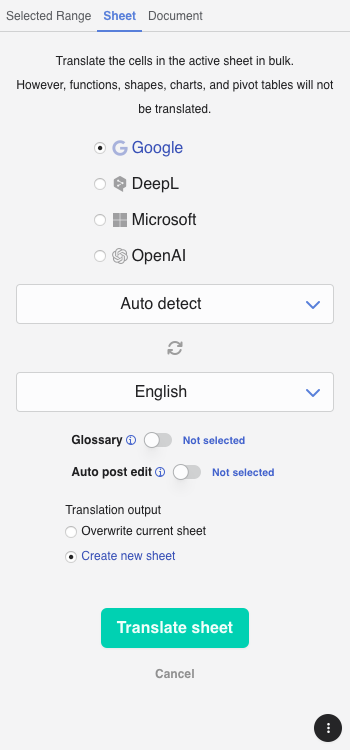
Translation output
| Output | Description |
|---|---|
| Overwrite current sheet | The translation result will be overwritten in the active sheet. |
| Create new sheet | The active sheet will be duplicated, and the translation result will be output. |
Translating slides in PowerPoint
In PowerPoint, you can translate multiple selected slides in bulk. Click the "Slides" tab on the translation panel, set an MT engine, source language, target language, glossaries, automatic post-editing condition sets, and the translation output, and then click "Translate slides".

Translation output
| Output | Description |
|---|---|
| Overwrite selected slides | The translation result will be overwritten in the selected slides. |
| Create new slides | The selected slides will be duplicated, and the translation result will be output. |
Translating with Outlook
In Outlook, MTrans for Office translates the subject and body of the selected incoming email or draft. Click the "Translate" button (![]() ) on the ribbon menu to display the translation panel. If you are not logged in, the login panel will be displayed first; after logging in, the translation panel appears.
) on the ribbon menu to display the translation panel. If you are not logged in, the login panel will be displayed first; after logging in, the translation panel appears.
Translating a selection of text
To translate text in an e-mail, click the "Selected Range" tab on the translation panel. When you select text, it will be read as source text. After selecting the MT engine and setting the source and target languages, click "▶ Run translation" to start the translation and display the translated text. This feature is available only for drafts and not for incoming e-mails.

Readable text
Range-selected text can be read.
Source language
A list of source languages supported by the selected MT engine is displayed. If you select "Auto detect", the MT engine will determine the source language.
The "Auto detect" might not be able to detect the language correctly depending on the source text. If the translation is not correct, please set the source language manually and translate again.
Target language
A list of target languages supported by the selected MT engine is displayed.
Swapping source language and target language
To swap the source and target languages, click the "![]() " button.
" button.
If you select multiple MT engines and perform simultaneous translation, icons will be displayed at the right end of the language list.
These indicate the support status for each MT engine, and languages that are supported by only some MT engines are marked with an icon for that MT engine.
Languages without icons can be translated by all MT engines currently selected.
If a language with an icon is used, there may be cases where translation fails with an MT engine other than the one represented by the icon.
| Icon | MT engine |
|---|---|
|
|
|
DeepL |
|
Microsoft |
|
OpenAI |
MT engine
Select Google, DeepL, Microsoft, or OpenAI. DeepL and OpenAI have optional settings.
DeepL options
Select "DeepL" for the MT engine and click on "Options" to set formal or informal tone for some target languages.
Note: When translating into Japanese, the settings are plain/polite.
Please refer to the DeepL Help Center for more information.
- About the formal/informal feature - DeepL Help Center
- About the plain/polite feature in Japanese - DeepL Help Center
OpenAI options
Select "OpenAI" for the MT engine and click on "Options" to set the field for translation or translation instructions (MT prompts) created in MTrans Online. By utilizing this option setting, you can have a higher possibility of obtaining optimal translation results. Please refer to the MTrans Online User Guide for information on managing MT prompts.
Edit buttons
- "Replace" button: The read source text will be replaced with the translated text.
- "Copy" button: The translated text will be copied to the clipboard.
"Add MT engine" button
You can add another MT engine to translate simultaneously.
Translating using glossaries
You can translate using glossaries created in MTrans Online. Click the "Glossary" toggle button to turn it on, and click the "No glossary selected" link. The glossary list dialog will be displayed, so select the glossaries you want to use.
Glossary list dialog
You can select up to five glossaries created in MTrans Online and apply them to the translation.
Please refer to the MTrans Online User Guide for information on managing glossaries.
Reloading the glossary list
You can reload the glossary list by clicking the "![]() " button after editing glossaries in MTrans Online.
" button after editing glossaries in MTrans Online.
Creating a new glossary
Click the "Create" button to display the glossary creation screen in MTrans Online.
Displaying or editing the glossary
Click the "![]() " button to open MTrans Online and display/edit the contents of each glossary.
" button to open MTrans Online and display/edit the contents of each glossary.
Setting priority
If there are duplicate terms among the selected glossaries, the terms from the glossary with a higher priority (lower number) will take precedence.
Post-editing automatically
Automatic post-editing is a function that automatically corrects translation results. This function allows you to unify the expression of the translated text or change it to an expression that follows a style guide.
You can use the automatic post-editing condition sets created in MTrans Online to perform automatic post-editing. Click the "Auto post edit" toggle button to turn it on, and click the "Not selected" link. A dialog will be displayed, so select the automatic post-editing condition sets you want to use.
Automatic post-editing condition set list dialog
You can select up to five automatic post-editing condition sets created in MTrans Online and apply them to the translation. For information on managing automatic post-editing condition sets, please refer to the MTrans Online User Guide.
Reloading the automatic post-editing condition set list
You can reload the automatic post-editing condition set list by clicking the "![]() " button after editing the automatic post-editing condition sets in MTrans Online.
" button after editing the automatic post-editing condition sets in MTrans Online.
Creating a new automatic post-editing condition set
Click the "Create" button to display the automatic post-editing condition set creation screen in MTrans Online.
Displaying or editing the automatic post-editing condition set
Click the "![]() " button to open MTrans Online and display/edit the contents of each automatic post-editing condition set.
" button to open MTrans Online and display/edit the contents of each automatic post-editing condition set.
Setting priority
If there are duplicate items among the selected automatic post-editing condition sets, the items from the automatic post-editing condition set with a higher priority (lower number) will take precedence.
Translating automatically
Click the "![]() " button to open the settings screen. Turn on the "Translate automatically" checkbox in "Translation Settings". This will allow you to translate automatically when you select text. This function is available only for drafts and not for incoming e-mails.
" button to open the settings screen. Turn on the "Translate automatically" checkbox in "Translation Settings". This will allow you to translate automatically when you select text. This function is available only for drafts and not for incoming e-mails.
Revising translation with AI (AI assistant function)
The AI assistant function allows you to improve translation results while interacting with generative AI. Depending on the instructions you provide, generative AI can revise translation results or answer questions about the translation. The generative AI model used is OpenAI's GPT-5.2, although the model version may change depending on the situation.
Using the AI assistant function
To use the AI assistant function, enter a message in the chat input field. The chat input field is placed above the bottom menu, or at the bottom of the chat panel if the panel is displayed on the right side of the add-in screen. After entering your message, click ![]() or press Ctrl + Enter (Windows) or Command + Enter (Mac) to send it. When a reply is received from generative AI, the translation result is revised based on the response, or an answer to your question is displayed in the chat panel.
or press Ctrl + Enter (Windows) or Command + Enter (Mac) to send it. When a reply is received from generative AI, the translation result is revised based on the response, or an answer to your question is displayed in the chat panel.
| Item | Description |
|---|---|
| "Just Ask" checkbox |
If checked, generative AI will not revise the translation result. Only an answer to your question will be displayed in the chat panel. |
| Clears all interactions shown in the chat panel. This does not affect the translation result. | |
| Undoes the last interaction. This does not affect the translation result. | |
| Restores an interaction that was undone. This does not affect the translation result. | |
| Switches the chat panel to full-screen view. | |
| Expands the chat panel and places it on the right side of the add-in screen. This button is available only when the add-in screen width is 500 px or more. It is not available in Outlook for Mac. |
|
| Minimizes the chat panel. | |
| Makes the chat panel a little taller. | |
| Makes the chat panel smaller. |
Making the most of the AI assistant function
With the AI assistant function, you can get feedback on translation results. Also, if you translate with multiple MT engines, you can ask it to compare them by giving an instruction such as "Review each translation."
Checking translation results before and after editing
This function lets you check translation results before and after editing. You can review the initial translation result from the MT engine, the result after applying glossaries, the result after automatic post-editing, and the result after revisions made by the AI assistant function.
![]()
Click the "Revisions" button in the target text panel to display the translation history menu. Hover over any menu item to preview the translation result from that point in the target text panel. Click a menu item to apply it.
All translation history
Click ![]() in the bottom menu to display the translation history menu for each MT engine's translation result. Hover over any menu item to preview the translation result from that point in each target text panel. Click a menu item to apply it.
in the bottom menu to display the translation history menu for each MT engine's translation result. Hover over any menu item to preview the translation result from that point in each target text panel. Click a menu item to apply it.
Downloading translation results
Click ![]() in the bottom menu to copy or download the source and target text. Use this when you want to compare the translation results from each MT engine or compare results before and after processing.
in the bottom menu to copy or download the source and target text. Use this when you want to compare the translation results from each MT engine or compare results before and after processing.
| Item | Description |
|---|---|
| Source text and translations displayed | Copy or download the source text and target text currently displayed on the screen. You can output them in CSV or JSON format. |
| All translations in the history | Copy or download the source text currently displayed on the screen and all target texts in the translation history. You can output them in CSV or JSON format. |
Translating including formatting
Click the "![]() " button to open the settings screen. Turn off the "Translate ignoring formatting" checkbox in "Translation Settings". This will allow you to translate including some formatting. This function is available only for drafts and not for incoming e-mails.
" button to open the settings screen. Turn off the "Translate ignoring formatting" checkbox in "Translation Settings". This will allow you to translate including some formatting. This function is available only for drafts and not for incoming e-mails.
Changing text size
Click on the "Settings" menu from the "⋮" button at the bottom right of the screen to open the settings screen. Click the "-" or "+" button in "Display Settings" > "Text size" to change the text size.
Translating a whole e-mail
To translate a whole e-mail, click the "Whole E-mail" tab on the translation panel. After selecting the MT engine and setting the source and target languages, click the "Translate" button to start the translation.
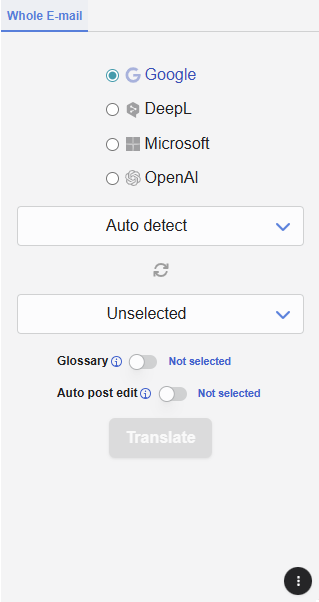
MT engine
Select Google, DeepL, Microsoft, or OpenAI. DeepL and OpenAI have optional settings.
DeepL options
Select "DeepL" for the MT engine and click on "Options" to set formal or informal tone for some target languages.
Note: When translating into Japanese, the settings are plain/polite.
Please refer to the DeepL Help Center for more information.
- About the formal/informal feature - DeepL Help Center
- About the plain/polite feature in Japanese - DeepL Help Center
OpenAI options
Select "OpenAI" for the MT engine and click on "Options" to set the field for translation or translation instructions (MT prompts) created in MTrans Online. By utilizing this option setting, you can have a higher possibility of obtaining optimal translation results. Please refer to the MTrans Online User Guide for information on managing MT prompts.
Source language
A list of source languages supported by the selected MT engine is displayed. If you select "Auto detect", the MT engine will determine the source language.
The "Auto detect" might not be able to detect the language correctly depending on the source text. If the translation is not correct, please set the source language manually and translate again.
Target language
A list of target languages supported by the selected MT engine is displayed.
Swapping source language and target language
To swap the source and target languages, click the "![]() " button.
" button.
"Translate" button
When you click the "Translate" button on the translation panel, the contents of the email will be read and translated by the specified MT engine. Once the translation has started, do not close the panel and wait until it is completed.
Preview of translation results
Once the translation is complete, the translation screen will change to display the translated subject and body. You can preview the translation results in HTML format by clicking the "Preview" button (available only for HTML format e-mails and when the "Auto post edit" is off). You can preview the translation results in plain text format by clicking the "Text" button. If you click the "![]() " button, the translation results will be displayed in a separate window.
" button, the translation results will be displayed in a separate window.
Using generative AI (AI prompt function)
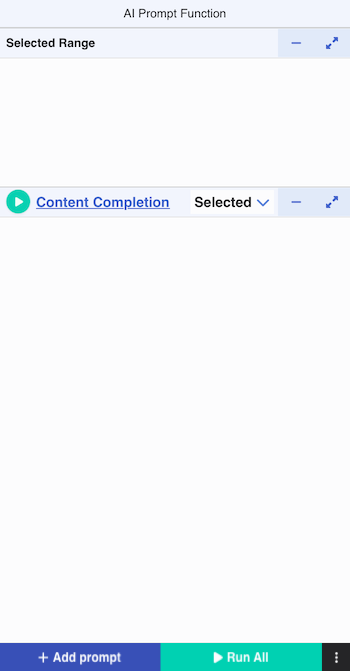
Click the "AI Prompt" button (![]() ) on the ribbon menu to display the operation panel for generative AI. If you are not logged in, the login panel will be displayed first; after logging in, the AI Prompt panel appears. The function that uses generative AI on this screen is called the "AI Prompt" function.
) on the ribbon menu to display the operation panel for generative AI. If you are not logged in, the login panel will be displayed first; after logging in, the AI Prompt panel appears. The function that uses generative AI on this screen is called the "AI Prompt" function.
Trying the AI prompt function
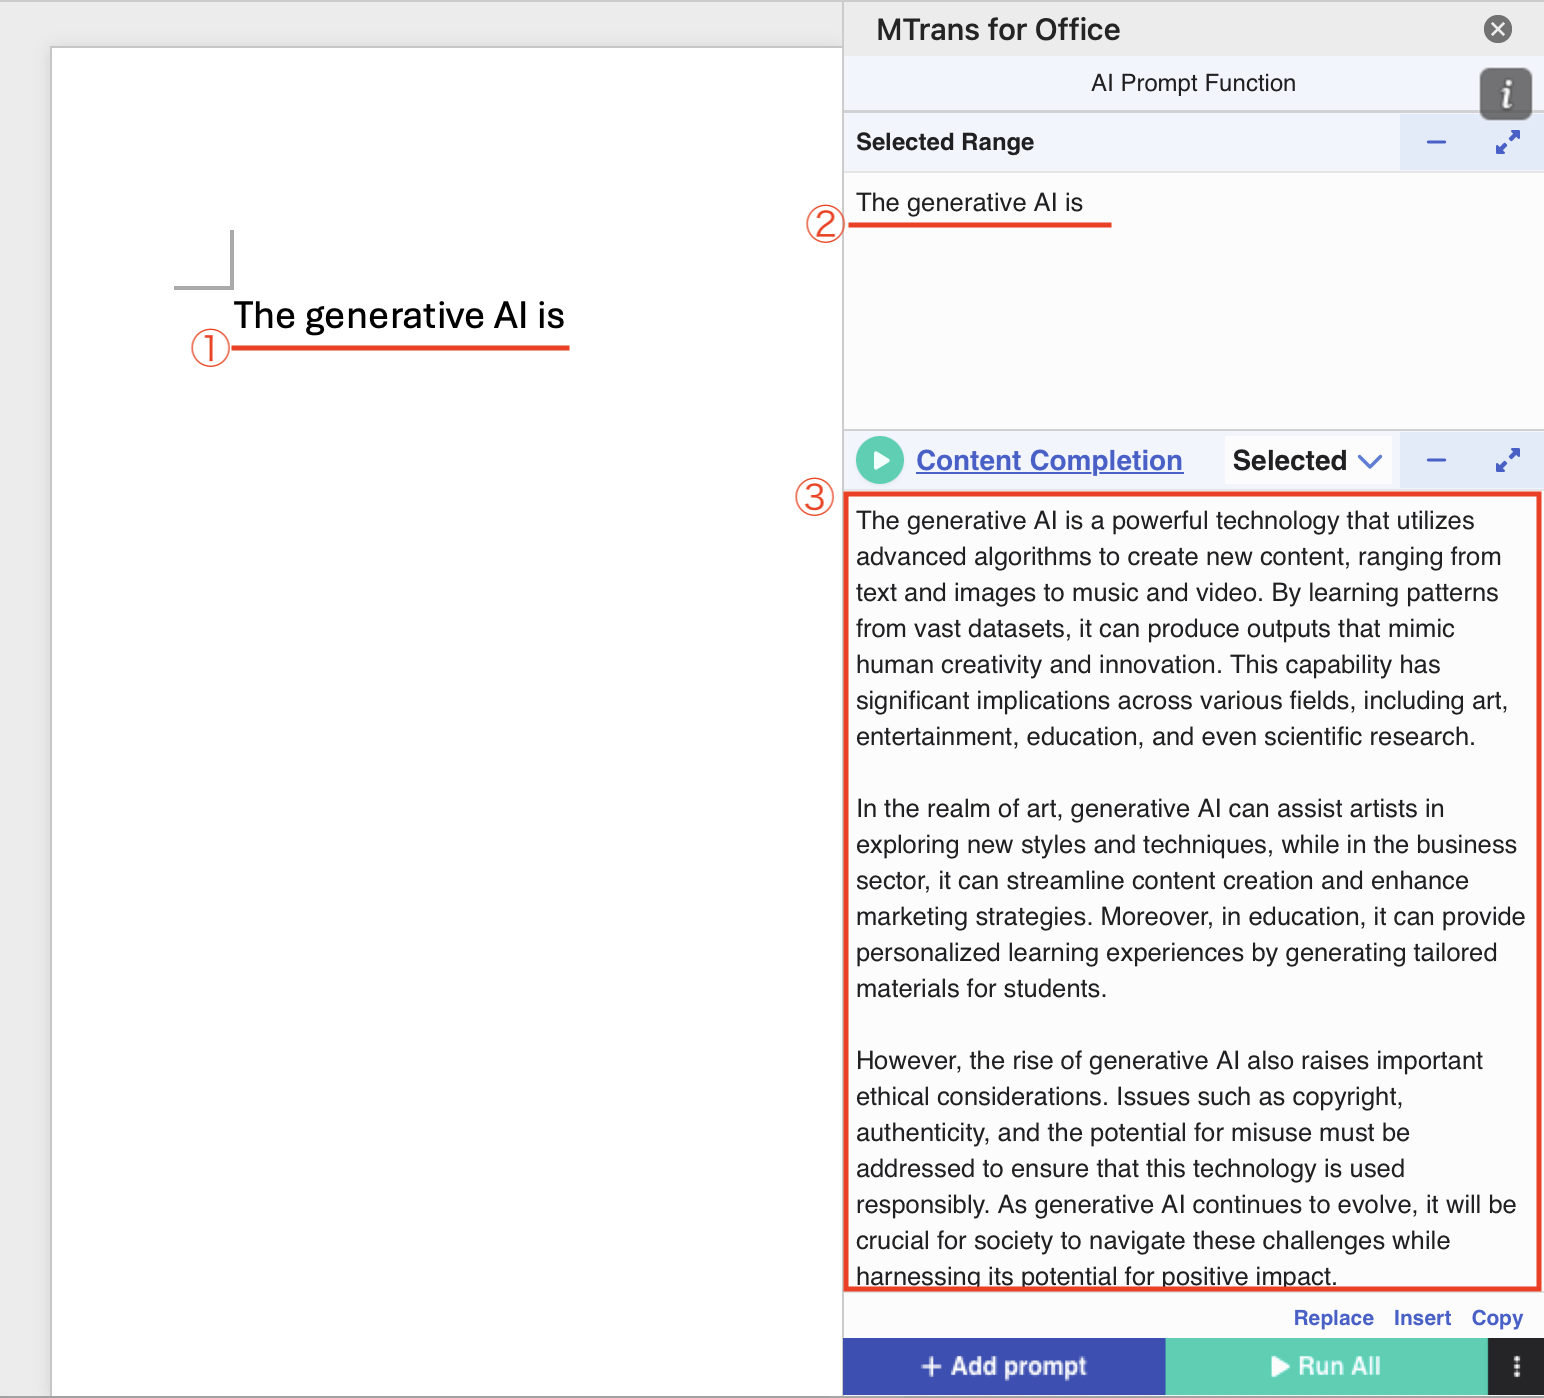
1. With the AI prompt screen displayed in Word, enter text into the Word document.
2. After you enter text and wait a moment, the text you entered will appear in the "Selected Range" section of the AI prompt screen.
3. Clicking the Run button (![]() ) will send the instruction "Content Completion" to the generative AI, which will output an answer based on the contents of the "Selected Range" section ("What is generative AI?").
) will send the instruction "Content Completion" to the generative AI, which will output an answer based on the contents of the "Selected Range" section ("What is generative AI?").
In this way, the AI prompt function sends questions and instructions to the generative AI based on the input text and outputs an answer. Instructions or questions given to the generative AI are called "prompts." The above "Content Completion" refers to the title of the prompt, but specifically,
Provide plain-format text to follow: <contents of "Selected Range"> (in the above example, "What is generative AI?")
is sent to the generative AI, which then outputs an answer.
About the operation screen
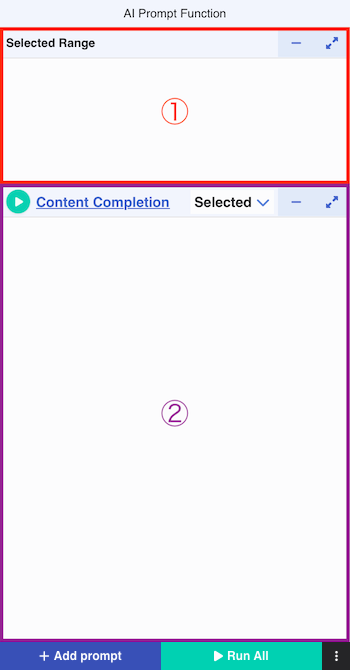
1. "Selected Range" section
This section displays the text or paragraph you have selected in your Word document, Excel sheet, PowerPoint slide, and Outlook draft. You can also manually enter text directly into this section. The text entered in this section will be used when sending prompts (instructions or questions to the generative AI). Specifically, it is incorporated as part of the prompt and sent to the generative AI.
2. AI prompt section
This section shows the answer provided by the generative AI. The answer can be inserted into your document, replaced with the selection, or copied using the toolbar at the bottom of the section.
Image
Run button
Click the button to send the prompt to the generative AI, which then outputs an answer.
Prompt title link (Content Completion)
Click the link to display the prompt setting screen (AI prompt setting dialog), where you can change the prompt to use. The link text displays the title of the prompt you want to use. By default, the prompt "Content Completion" is set.
"Selected Range"/"All Text" dropdown
Select the text you want to include in the prompt. If you select "Selected Range", the text in the "Selected Range" section is included in the prompt. If you select "All Text", the text of the entire document/e-mail is included in the prompt.
This dropdown is only available in Word and Outlook drafts. In Excel and PowerPoint, "Selected Range" is always applied. In Outlook inbox e-mails, "All Text" is always applied.
For example, a prompt that obtains subsequent content while entering a sentence (Content Completion) is basically intended for "Selected Range", but there may also be cases where a prompt that summarizes the document is used in parallel. If "Selected Range" is selected for the Summarization prompt, you will need to manually select the entire text in the document when you want to summarize the entire document. This method changes the cursor position, so you may need to return to the original editing position after checking the summary provided by the prompt, or it may make it difficult to use other prompts specifically for "Selection Range" in parallel, which may reduce work efficiency.
However, if you switch only the Summarization prompt to "All Text" using this pull-down menu, you no longer have to go through the trouble of selecting all the text in the entire document, allowing you to smoothly summarize the entire document while using other prompts without having to stop editing.
"+ Add prompt" button
Click the button to display the prompt setting screen (AI prompt setting dialog) to add a new prompt. By adding prompts, you can use multiple prompts in parallel. You can add up to four prompts.
AI prompt setting dialog
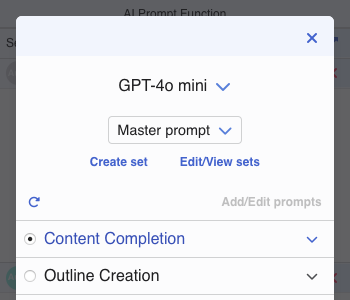
Click the prompt title link or the "+ Add prompt" button to display the AI prompt setting dialog. In this dialog, you can change the generative AI model and prompts to be used.
For available generative AI models, please see Supported MT engines/LLMs (Large Language Models).
Prompts are selected from the "Master prompt" or from a set of AI prompts created in MTrans Online.
Clicking the "Create set" button will display the AI prompt set creation screen in MTrans Online.
Clicking the "Edit/View sets" button will display the AI prompt set list screen in MTrans Online. You can change set names and disclosure destinations.
Clicking the "Add/Edit prompts" button will display the editing screen for the selected AI prompt set in MTrans Online (this button is unavailable when "Master prompt" is selected).
For more information on creating, editing, and managing AI prompt sets, please refer to the MTrans Online User Guide.
About master prompt
Master prompts are prompts that Human Science provides. Master prompts contain versatile prompts that can be used in a variety of situations, and can be used in parallel with prompts that you have created in MTrans Online. Master prompts may be added or changed without notice.
Running prompts automatically
Click on the "Settings" menu from the "⋮" button at the bottom right of the screen to open the settings screen. Turn on the "Run prompts automatically" checkbox. This will allow you to run prompts automatically when you select text. However, this setting only applies to prompts with "Selected Range" selected in the "Selected Range" pull-down, and does not apply to prompts with "All Text" selected.
This option setting is available in Word/Excel/PowerPoint/Outlook (drafts). It is not available for e-mails in Inbox for Outlook.

Proofing Word documents (AI Proofing function)
About the AI Proofing function
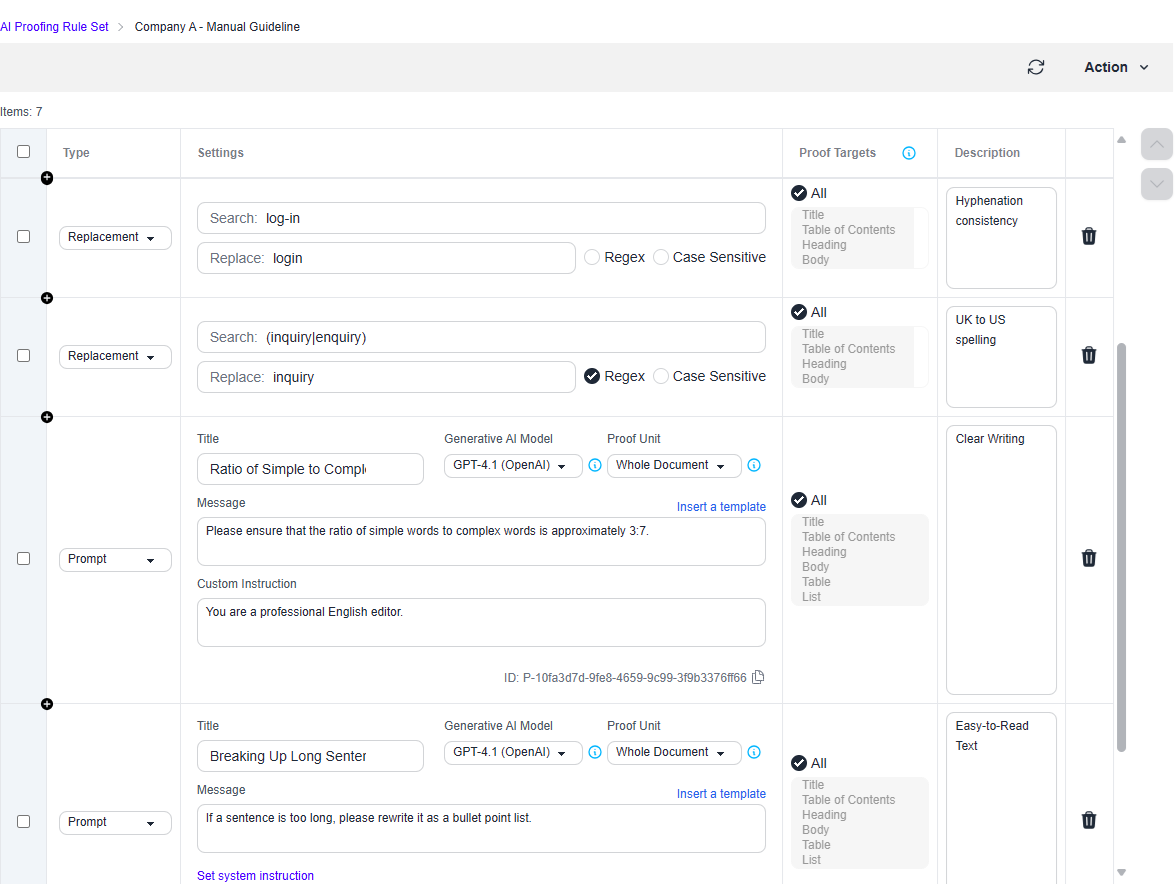
The AI Proofing function allows you to proofread a Word document using user-defined proofing rules. There are two types of rules: “Search & Replace” rules that replace specified text with other text, and “Prompt” rules that instruct a generative AI model to perform proofing. Proofing rules are created and managed in MTrans Online as "AI Proofing Rule Sets". This function is available in Word for Windows (Microsoft 365) and Word for Mac. It is not available in Word for web browsers.
Difference from Word “Editor” function
Word includes the built-in “Editor” function, which checks spelling, grammar, and consistency (style variations). The table below compares the Word “Editor” function and the AI Proofing function in MTrans for Office.
| Item | Word “Editor” function | AI Proofing function in MTrans for Office | ||
|---|---|---|---|---|
| Primary focus | Formal correctness | Semantic validity & effectiveness | ||
| Spelling / Grammar | ◯ | High-accuracy rule/dictionary based detection | △ | User creates check conditions |
| Style consistency (notation variants) | ◯ | High-accuracy rule based detection | ||
| Terminology checking | △ | Simple search & replace supported | ◯ | Batch search & replace with multiple conditions (regex supported) |
| Understanding context / meaning | ✕ | Does not understand connections between words and sentences | ◯ | Understands context & logical consistency, can suggest improvements |
| Information completeness | ✕ | Cannot detect missing information | ◯ | Points out missing/excessive content contextually |
| Customizability of checks | △ | Toggle predefined check categories | ◯ | Create custom search & replace conditions and prompts |
In this way, the AI Proofing function plays a complementary role to the Word “Editor” function. By using both functions in combination, you can proof documents from two perspectives: formal correctness, and semantic validity & effectiveness.
Launching / Setting up
- Click the "AI Proofing" button (
 ) on the ribbon menu to display the AI Proofing screen. If you are not logged in, the login panel will appear first; after logging in, the AI Proofing screen appears.
 - Follow the steps on the screen to create and select an AI Proofing Rule Set, then perform proofing for the Word document.
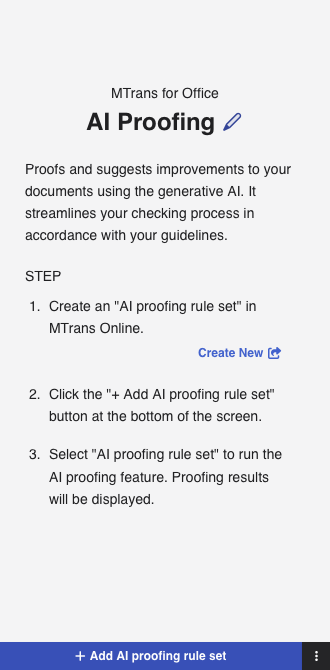
- To create an AI Proofing Rule Set, click the "Create" button to open MTrans Online. For details on creating and managing AI Proofing Rule Sets, see the MTrans Online User Guide.
- After creating a rule set, return to the AI Proofing screen and click "Add AI Proofing Rule Set" to select the created set.

- The selected AI Proofing Rule Sets are displayed on the screen; each registered Search & Replace item and Prompt item is also listed.
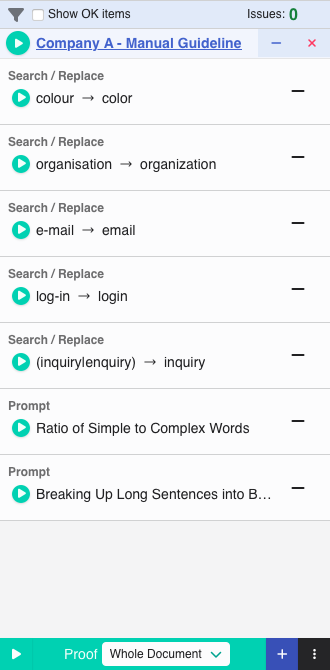
Running proofing
-
Click "Run All" or the "Run" button for an individual rule set to start proofing the Word document. When proofing is complete, results are displayed for each Search & Replace item and Prompt item.

-
Click an item (Search & Replace or Prompt) with issues to display the list of issues. Issues are displayed in page order; document-wide or location-unknown issues appear at the end. Review each issue and revise the relevant location. The header of the issue list shows the number of issues.
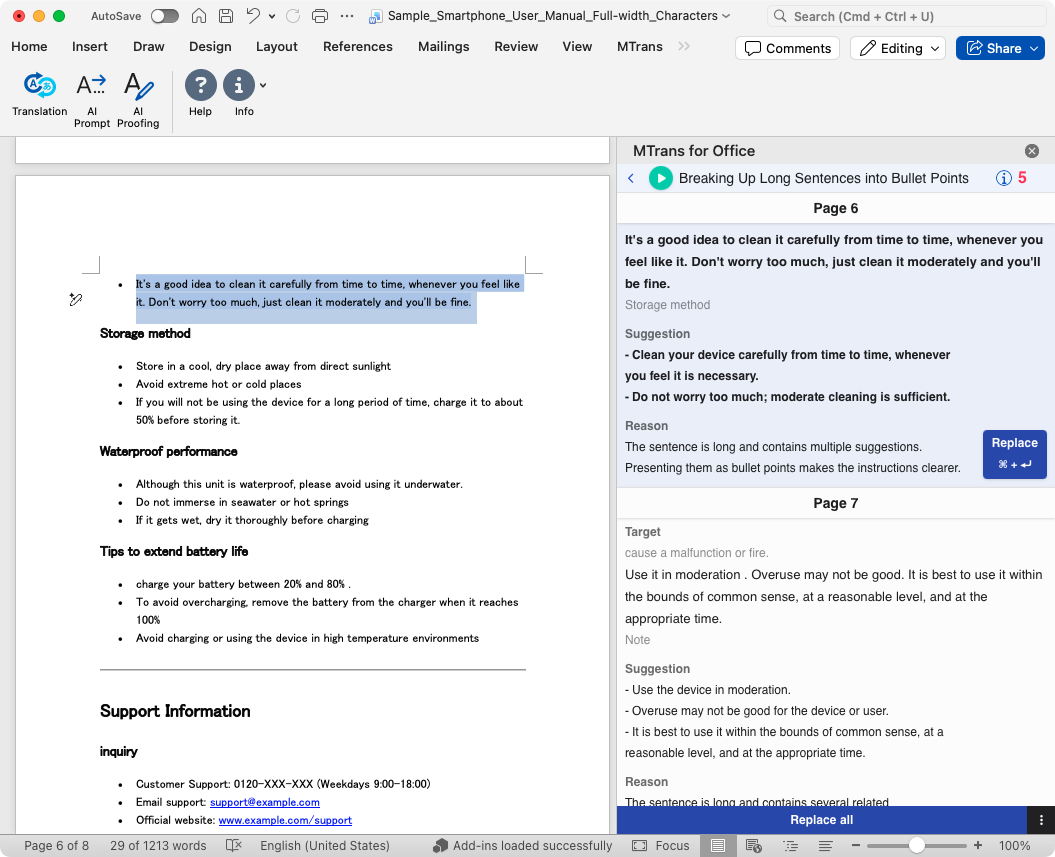
| Field | Description | |
|---|---|---|
| Target | A preview of the location where the issue occurred. Click to jump to that location. Not shown for document-wide issues. | |
| Suggestion | Suggested corrections for the issue. Clicking the "Replace" button applies the suggestion. | |
| "Replace" button | Applies the suggested correction. After application, the "Done" checkbox is checked. Hidden if the location is unknown. | |
| "Revert" button | Reverts a suggestion applied with "Replace" and unchecks the "Done" checkbox. | |
| Reason | The reason provided by generative AI for the issue (Prompt items only). | |
| "Done" checkbox | Check when the issue is resolved. When checked, the issue count in the header decreases. If you click "Replace" to apply a suggestion, it is checked automatically. Issues with no change required but already reviewed can also be manually checked to mark completion. | |
- Review each issue and either click "Replace" to apply a suggestion or check "Done" for issues where no change is needed. Clicking the "Replace all" button at the bottom of the screen applies suggestions in bulk to all undone, replaceable issues.
-
Some text (headers, footers, etc.) is excluded from proofing.
-
Text within shapes is included in proofing only if displayed in print layout.
Other settings
Changing to dark mode
Click on the "Settings" menu from the "⋮" button at the bottom right of the screen to open the settings screen. In "Display Settings", select "Dark" in "Theme" to change to dark mode. When "Auto" is selected, the appearance will automatically switch according to the OS theme or the Office application theme (the behavior may vary depending on the Office environment).
Limitations / Known Issues
Translation function
Word, Excel, PowerPoint
- Translatable body size differs depending on the MT engine in the document translation function.
| MT engine | File size |
|---|---|
| 20 MB | |
| DeepL | 25 MB |
Outlook
- Office add-ins are not available for POP e-mail accounts.
- To use Office add-ins with an IMAP e-mail account, the e-mail account must be synchronized to the Microsoft Cloud (synchronisation settings are available only in the new UI version). For more information, see Microsoft's support page.
- Translatable body size differs depending on the MT engine.
MT engine Body size Google Less than 2 MB DeepL Less than 1.2 MB Microsoft / OpenAI Several tens of KB (varies depending on the content) - Partial selection and translation of draft subject text is not supported (technical limitation of the Office add-in platform).
AI Proofing function
- Some text (headers, footers, shapes, etc.) is excluded from proofing.
- Documents containing section breaks may take longer to process.
Support
If you have any further questions, please contact our support (mtrans-support@science.co.jp).
Revision history
May 22, 2026
Updated "Using the AI assistant function" because Outlook for Windows and Outlook on the web now support ![]() (the button that places the chat panel on the right side of the add-in screen).
(the button that places the chat panel on the right side of the add-in screen).
May 15, 2026
Added descriptions for the AI assistant function, translation history, and downloading translation results.
Word, Excel, PowerPoint
- AI assistant function: "Revising translation with AI (AI assistant function)"
- Translation history: "Checking translation results before and after editing"
- Downloading translation results: "Downloading translation results"
Outlook
- AI assistant function: "Revising translation with AI (AI assistant function)"
- Translation history: "Checking translation results before and after editing"
- Downloading translation results: "Downloading translation results"
March 19, 2026
- Updated "Logging in" (added how to check the app client ID when logging in with SSO)
January 26, 2026
- Updated notes regarding proofing of shapes in "Running proofing"
November 19, 2025
- Changed marketplace name references from "AppSource" to "Microsoft Marketplace".
November 7, 2025
- Merged the "Limitations" and "Known issues" sections into one ("Limitations / Known Issues").
- Added limitations / known issues for the AI Proofing function.
November 4, 2025
- Added "Proofing Word documents (AI Proofing function)"
- Updated ribbon screenshots (removed "Account" button, added "AI Proofing" button)
- Updated login procedure as “Account” button was removed
- Updated content in "Logging out"
- Added model "GPT-5" and removed "GPT-4.1 nano" in the AI prompt function model list
See more past history
August 28, 2025
- Removed the note indicating that the "Preview of translation results" section in "Translating a whole e-mail" is only available for the Mac version.
August 5, 2025
- Added the "Preview of translation results" section to "Translating a whole e-mail"
July 25, 2025
- Added descriptions for the "Insert right", "Overwrite right", "Insert below", and "Overwrite below" buttons in the "Edit buttons" section of "Translating a selection of text" in "Translating with Word, Excel, and PowerPoint"
June 2, 2025
- Changed the name of "MTrans for Office (Office Add-in version)" to "MTrans for Office (XP version)" and updated the related descriptions.
- Clarified the differences between "Windows version and XP (cross platform) version" in "Windows version and XP (Cross Platform) version" by explaining the differences between VSTO version (Windows-only high-functionality add-in) and XP version (cross-platform compatible).
May 26, 2025
- Added the translatable body size in "Word, Excel, PowerPoint limitations" for the document translation function depending on the MT engine
May 20, 2025
- Added "Translating slides in PowerPoint"
April 30, 2025
- Updated the followings in "Supported MT engines/LLMs (Large Language Models)"
- Changed the model of the MT engine "OpenAI" for the translation function from "GPT-4o mini" to "GPT-4.1"
- Changed the model of the generative AI for the AI prompt function from "GPT-4o mini" and "GPT-4o" to "GPT-4.1" and "GPT-4.1 nano"
February 13, 2025
- Added "Translating a sheet in Excel"
January 24, 2025
- Added and updated descriptions for Outlook inbox e-mails in "Using generative AI (AI prompt function)" because the AI prompt function is now available for them.
January 16, 2025
- Added "Running prompts automatically"
- Updated operating procedures in accordance with various setting UI changes
December 20, 2024
November 12, 2024
- Updated screenshots of the ribbon
October 21, 2024
- Added "OpenAI options" to "Translating with Word, Excel, and PowerPoint"
- Added "OpenAI options" to "Translating with Outlook"
- Added "OpenAI options" to "Translating a whole e-mail"
- Changed the wording of "Prompt and replacement condition set" to "Automatic post-editing condition set"
- Changed the wording of "Term Adaptation" to "Glossary"
September 13, 2024
- Added "Changing to dark mode"
September 2, 2024
- Corrected the translatable body size from less than 3 MB to less than 1 MB in the Outlook limitations
August 20, 2024
- Changed the MT engine of OpenAI from GPT-3.5 to GPT-4o mini
August 7, 2024
- Added notes on getting Office add-ins via AppSource from a browser and via Microsoft 365 admin center
- Added a limitation that Outlook add-ins are not available for POP e-mail accounts
- Added a limitation on the use of Outlook add-ins with IMAP e-mail accounts
July 25, 2024
- Removed the statement that the creation of glossaries and "Prompt and replacement condition" sets requires users to translation managers.
July 17, 2024
- Removed the statement that DeepL is not available for Excel from "MT engine" in Translating a whole document
July 10, 2024
- Added the steps to get and use MTrans for Outlook in the Windows desktop version (new UI)
June 25, 2024
MTrans for Office
- Added "Post-editing automatically" to "Translating with Word, Excel, and PowerPoint"
- Added "Creating a new glossary" to "Translating with Word, Excel, and PowerPoint"
MTrans for Outlook
- Added "Post-editing automatically" to "Translating with Outlook"
- Added "Creating a new glossary" to "Translating with Outlook"
May 29, 2024
- Changed the MT engine "ChatGPT API" to "OpenAI"
- Updated the steps to get MTrans for Office (for Word, Excel, and PowerPoint) for Mac
- Added how to turn on the term adaptation function in the selected range translation screen
April 23, 2024
- Updated the steps to get and use MTrans for Outlook in the web version of Outlook due to UI changes
January 31, 2024
- Added ChatGPT API to "MT engine" in "Translating a selection of text" and "Translating a whole e-mail"
December 15, 2023
- Added Microsoft (Microsoft Translator) to the description of MT engines
December 07, 2023
- Added description about the application of the glossary
November 08, 2023
- Changed the description order of some items due to the renewal of the selected range translation screen
- Added description of simultaneous translation by multiple MT engines
- Added description of settings screen
September 08, 2023
- Added: Formal and informal tone setting (DeepL only)
- Added: "Translate automatically" checkbox
August 25, 2023
- Deleted the statement that only the Mac version is supported in the description of the "Translate ignoring formatting" checkbox in Outlook
August 10, 2023
- "Translate ignoring formatting" checkbox also added to Outlook
July 21, 2023
- "Translate ignoring formatting" checkbox added
- Note added about "Auto-detect" of the source language
June 23, 2023
- "Translating a selection of text" added
April 14, 2023
- Single sign-on (SSO) customer information updated
January 19, 2023
- Single sign-on (SSO) customer information added
December 2022
- Newly created